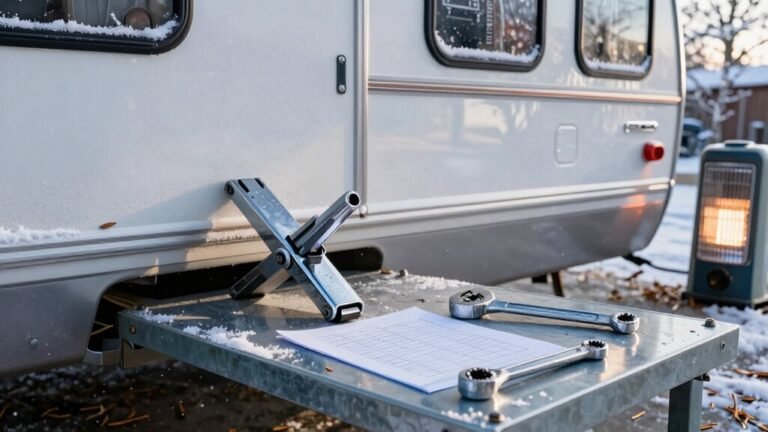
How to Maintain RV Slide-Outs (Seals & Lubrication)
To keep your RV slide-outs operating smoothly, inspect the seals monthly for cracks, tears, or buildup of grime. Maintaining RV slide-outs includes cleaning the tracks with mild soap and thoroughly drying them before applying lubricant.
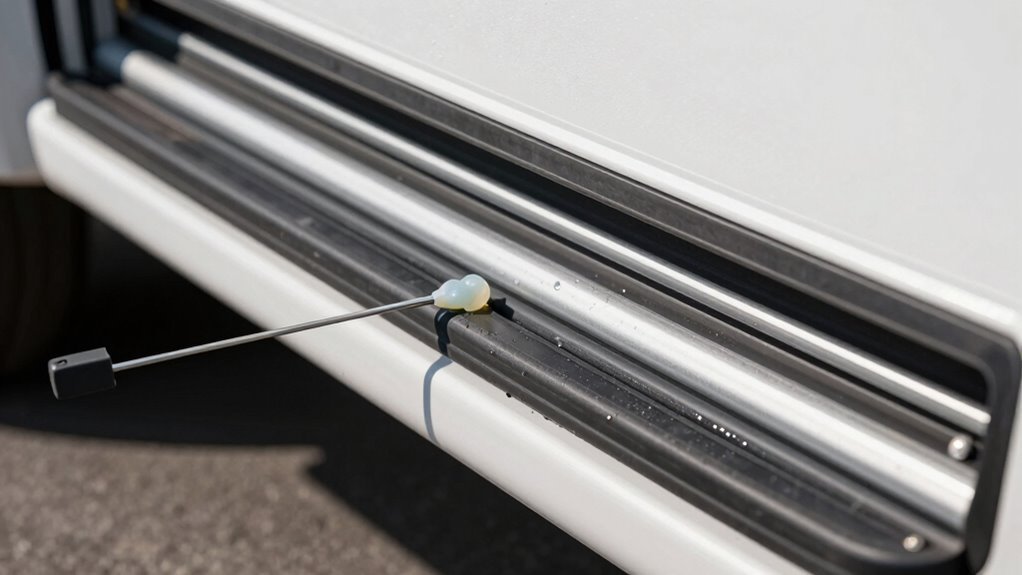
Apply a dry lubricant like PTFE to the tracks to ensure smooth movement—this reduces friction without attracting dust and debris. Avoid oily sprays, as they quickly become dirt magnets that can damage the mechanism over time.
For added protection, lightly dust the seals with baby powder to prevent sticking and extend their lifespan. Synchronize the slide-out motors by holding the control button for a few seconds after full extension or retraction.
Understanding RV Slide-Out Components
Ever wonder what makes your RV’s slide-out glide so smoothly? It’s not magic—it’s mechanics! Depending on your rig, you’ve got systems like rack and pinion, cable-driven, hydraulic, through-frame, or sleek SlimRack setups.
Big, heavy slides use powerful gear systems or hydraulics, while smaller ones rely on cables or slim tracks.
Motors—electric or hydraulic—do the heavy lifting, whether mounted on walls, under floors, or hidden in frames.
Some use cables you can actually see (hello, Tetris-level engineering!), others glide silently on racks.
They all work together so your living space expands like a pop-up storybook.
But hey, they’re not set-and-forget.
Each system needs love—lube, alignment, tension checks—to keep things running buttery smooth.
Think of it as spa day for your slide-out.
Neglect it? You’ll hear grinds, squeaks, or worse—stuck slides on a rainy day.
Yikes!
Regular maintenance can help your system last 10–15 years.
Inspecting Slide-Out Seals for Damage
You’ve got the mechanics down—those gears, motors, and racks that make your slide-out move like magic—but now let’s talk about the unsung hero keeping the great outdoors outside: the seals.
Check them every 30 days—yes, really—and definitely before trips or seasonal storage.
Look for cracks, tears, or gaps like a detective on a mission.
Is water getting in? That’s a dead giveaway.
Peek behind the molding and inspect the inner and outer seals, especially the H-seal’s skinny middle part—it’s drama-prone.
Extend and retract the slide a few times; if it sticks or squeaks, something’s wrong.
Use a water test to catch sneaky leaks, but don’t panic—silicone sealant can play backup.
And hey, if your seal’s flatter than week-old soda, it’s time for a replacement.
The exterior wiper of the H-seal is often the first to wear out, so pay close attention to that part during inspection (exterior wiper).
Stay sharp, stay dry, and keep that cozy interior safe from surprise showers!
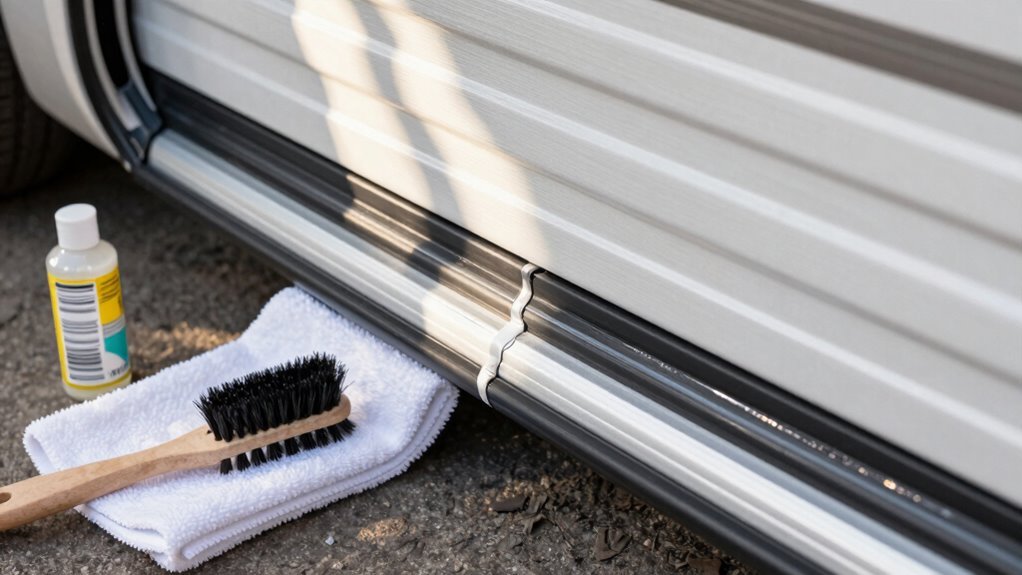
Cleaning Slide-Out Tracks and Seals

How does your RV stay battle-ready against grime and gunk?
You clean those slide-out tracks and seals like a pro!
Start by wiping away loose dirt with a damp rag—trust me, sand doesn’t belong in your sealing system.
Grab a scrub brush and attack the grooves until they’re totally clear.
Use mild soap and water on seals, frame, rails, and rollers, or step it up with RV roof cleaner for stubborn messes.
Don’t forget the nitty-gritty spots like rack and pinion teeth and cable-driven areas.
Here’s your game plan:
- Use a long pole with a towel or roof rake to reach high tracks.
- Spray cleaner with a bottle, then scrub and wipe for even coverage.
- Always clean before lubricating—dirty parts don’t like slippery love!
Regular maintenance helps prevent wear on the mechanical actuation path components unique to gear-driven systems.
Replacing Worn or Cracked Seals
Replacing cracked or worn seals isn’t just smart maintenance—it’s your RV’s ticket to staying dry, draft-free, and ready for adventure.
First, check the seal’s profile under the slide-out and measure it carefully—this isn’t a “close enough” kind of job.
Note how it attaches: push-on, adhesive, screws, or staples.
Grab the right replacement from trusted brands like Steele Rubber, plus tools like plastic scrapers, gloves, and adhesive.
Remove the old seal gently to avoid damage—even better if it’s intact for reference.
Clean the area thoroughly; no one likes gunk under new parts.
Cut the new seal to size, align it with the pinch weld, and press it firmly into place.
Secure it with screws every 8 inches and glue overlaps.
Test it by sliding in and out a few times.
Boom—your RV’s back in seal shape and laughing at leaks!
Applying Protective Seal Treatments
Now that you’ve got your seals swapped out and snug, it’s time to give them some love with protective treatments—because keeping them clean and conditioned is like spa day for your RV, minus the cucumber water.
Treat your seals right, and they’ll keep the rain (and critters) where they belong—outside.
Here’s how to pamper them like a pro:
- Clean gently with a warm water and dish soap mix—skip the power washer, or you’ll blast away more than just dirt.
- Condition regularly using a water-based product like 303 Aerospace Protectant every few months to block UV damage and dryness.
- Lubricate smart by dusting inner and outer seals with baby powder via a sock—it fights stickiness without gumming things up.
Do this twice a year or after heavy rain, and your seals will feel fresh, stay flexible, and laugh in the face of leaks. Your RV will thank you—probably with fewer surprise puddles.
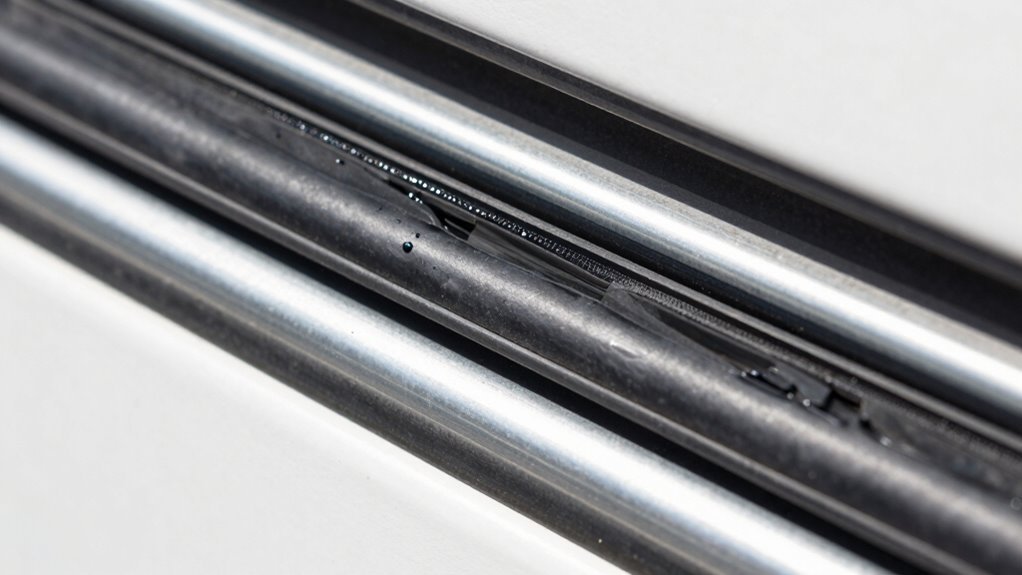
Identifying Lubrication Points on Slide Mechanisms
One quick peek under your fully extended slide-out and you’ll spot the moving parts that keep everything gliding smoothly—think of it as the secret backstage crew of your RV’s comfort show.
Head outside, park on level ground, and give that room a full reveal.
For hydraulic systems, check the inner arms and rails—rollers and tracks wear down fast if ignored.
Rack-and-pinion? Slide lube along the track’s four inner surfaces, but skip the gear—don’t drown the party, just spritz the edges.
Cable-driven? Focus on exterior cables and pulleys; if they squeak, they’re begging for attention.
Schwintek slides need love at the gib, coupler, and track center—flip that rubber flap and sneak in from above and below.
Peek at the manual—every brand hides access points like Easter eggs.
Clean grime first, then play detective: spot the stress points, because a little lube now saves a mountain of stress later.
Choosing the Right Lubricant for Slide-Outs
Ever wonder why some RV slide-outs glide like they’re on ice while others creak and groan like an old screen door?
The secret’s in the lube you choose.
Picking the right one keeps things smooth and avoids messy, gritty headaches down the road.
Here’s how to get it right:
- Use synthetic grease like Hot Shot’s Secret—it handles crazy temps and fights rust like a champ.
- Try dry lubricants with PTFE or silicone, great for tracks and won’t attract dirt (just check compatibility first!).
- Skip oil-based or propellant-heavy sprays—they gum up tracks and can ruin rubber seals over time.
Always follow your RV maker’s advice—some systems, like Schwintek or hydraulic setups, need specific care.
A little know-how goes a long way in keeping your slides slick, quiet, and ready for adventure.
Your RV will thank you every time you hit the road!
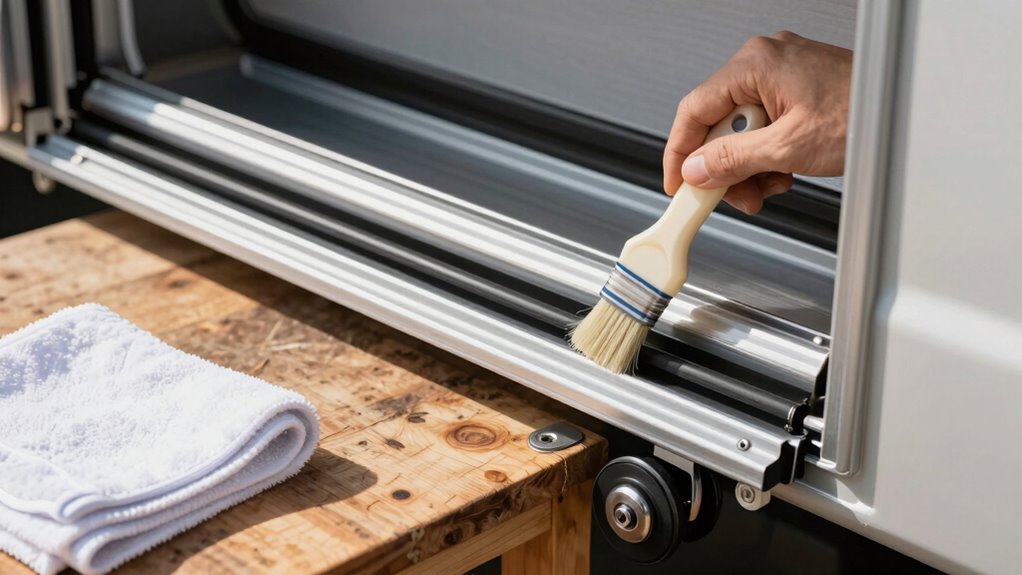
Lubricating Slide-Out Rails and Gears
You’ve picked the perfect lube—now let’s put it to work where the magic happens: your slide-out rails and gears.
Give those rails three squeezes of dry lube like Boeshield T-9 or a silicone-based spray at least twice a year, or monthly if you’re always on the road.
Hitting the coast, dust, or snow? Lubricate even more—your RV will thank you.
For rack-and-pinion systems, spray all four track sides, hit the gears, then wipe off extra so gunk doesn’t crash the party.
With Schwintek, sneak lube under the rubber seals to reach rollers, bearings, and plastic guides—don’t forget those shy little wheels.
Clean the tracks first; dirt loves to hitchhike.
Then run the slide to spread the lube evenly.
Avoid wet lubes—they’re like magnets for grime.
Dry is the way to go!
Keep it slick, and your slide will glide like butter—no drama, just smooth moves.
Testing Slide-Out Operation After Maintenance
What’s better than a perfectly tuned slide-out? Watching it glide open and closed like a pro—smooth, quiet, and drama-free. Before you celebrate, run a quick test to make sure everything’s shipshape.
- Check your setup: Park level, charge that battery, and clear both inside and out—no surprise couch-to-slide collisions!
- Power up wisely: Reconnect power, listen for the motor hum, and peek at fuses or fluid levels if things go silent—don’t panic, just troubleshoot.
- Test drive it: Open and close a few times, hold that button at the end to sync motors, and keep an eye out for hiccups like lagging sides or weird noises.
If it sticks, stay cool—override the system or give it a gentle nudge.
When it runs like butter? You’ve earned that happy dance. Slide victory!
Frequently Asked Questions
How Often Should I Inspect My RV Slide-Outs?
You should check your RV slide-outs every month—it’s quick and keeps big problems away.
Peek at seals, alignment, and moving parts while you’re out there.
Every three months, give them a deeper look and clean around the seals.
If you’re bouncing down dusty roads or parked in blazing sun, peek more often.
And hey, your slide-outs won’t complain—unlike your knees after camping!
Can I Use Silicone Spray on Slide-Out Seals?
Nope, don’t use silicone spray on your slide-out seals—it’s a no-go.
It can ruin plastic seals, attract dirt, and cause gunk buildup over time.
You’re better off skipping it completely.
Instead, grab a water-based conditioner; it’s way gentler and what manufacturers actually recommend.
Think of it like swapping soda for water—healthier for your seals!
Clean them first with soapy water, then protect ’em.
Your RV will thank you with smoother slides and fewer surprises.
What Causes Slide-Outs to Stick or Jam Frequently?
Your slide-outs stick like a stiff jar lid when gunk clogs the tracks—dirt, leaves, and grime grind gears and block movement.
Without lube, parts rub raw and motors strain.
Misalignment tugs things crooked, while worn rollers or bent arms throw everything off kilter.
Weak batteries or blown fuses cut power, leaving you stuck mid-extension.
Check, clean, and grease often—it keeps your slides gliding like butter!
Should I Leave My Slide-Outs in or Out When Storing?
You should leave your slide-outs in when storing if it’s rainy or humid—you don’t wanna invite leaks and mold to your RV’s slumber party!
But in dry climates, pop ’em out to keep seals happy and flexible.
Think of it like sunscreen: use it when it’s hot, skip it when it’s wet!
Add a dehumidifier, check seals now and then, and your RV’ll wake up feeling fresh, not funky!
Can I Manually Operate Slide-Outs if Power Fails?
Yes, you can manually operate your slide-outs if power fails—about 68% of RV owners face this at least once!
Grab your socket or crank, locate the motor, and turn clockwise.
It’ll take some muscle and 10–15 minutes, but you’ve got this.
Just stop when it’s flush—no superhero strength needed.
Pro tip: over-cranking’s a sneaky foe, so ease up!
Conclusion
You’ve checked the seals, cleaned the tracks, and lubed every gear—great job! Now your slide-outs glide smoother than a disco ball spins at a 1970s dance-off. Keep up these quick checks, and they’ll keep doing their job like trusty robots from the future. A little love goes a long way, so don’t wait for squeaks. You’re not just maintaining your RV—you’re keeping the adventure alive, one smooth slide at a time!
References
- https://www.carefreeofcolorado.com/blog/rv-slide-out-mechanism-types/
- https://blog.campingworld.com/learn-to-rv/how-does-an-rv-slide-out-work/
- https://www.lippert.com/blog/types-of-rv-slide-outs
- https://www.youtube.com/watch?v=lQPIrVaSOlk
- https://myrvworks.com/wp-content/uploads/2019/04/Electric_Through_Frame_Slide_out_Service_Manual_.pdf
- https://www.rv.com/archive/rv-slideout-maintenance-simplified/
- https://www.youtube.com/watch?v=nYDBvuWnHrs
- https://www.kohree.com/blogs/buyers-guides/all-you-need-to-know-about-rv-slide-outs
- https://blog.steelerubber.com/2025/07/15/how-to-remove-and-replace-the-exterior-portion-of-an-h-seal-on-your-rv-slide-out/
- https://customskirting.com/types-of-rv-slide-out-seals-2/