RV Maintenance Checklist: Regular Tasks for Every Season
Check your tires monthly—inflate to the right PSI and inspect tread with a penny or quarter. Keeping up with this part of your RV maintenance checklist helps ensure safe, smooth travels no matter the season.
Seal gaps around windows and vents every season to prevent drafts and water damage. Apply rubber seal conditioner regularly to keep seals flexible and leak-free, a key step in your RV maintenance checklist.
Test batteries and troubleshoot electrical issues before each trip. Address plumbing leaks immediately—small drips can lead to costly repairs down the road.
Inspect the roof, slide-outs, and brakes with care, looking for wear or damage. Make sure propane connections are secure and smoke and carbon monoxide alarms are functioning properly.
When you follow a consistent RV maintenance checklist, you’re not just repairing—you’re preventing problems and mastering the art of worry-free adventures. Next up: the little things that save your trips before they start.
Inspect and Inflate Tires at the Start of Each Season
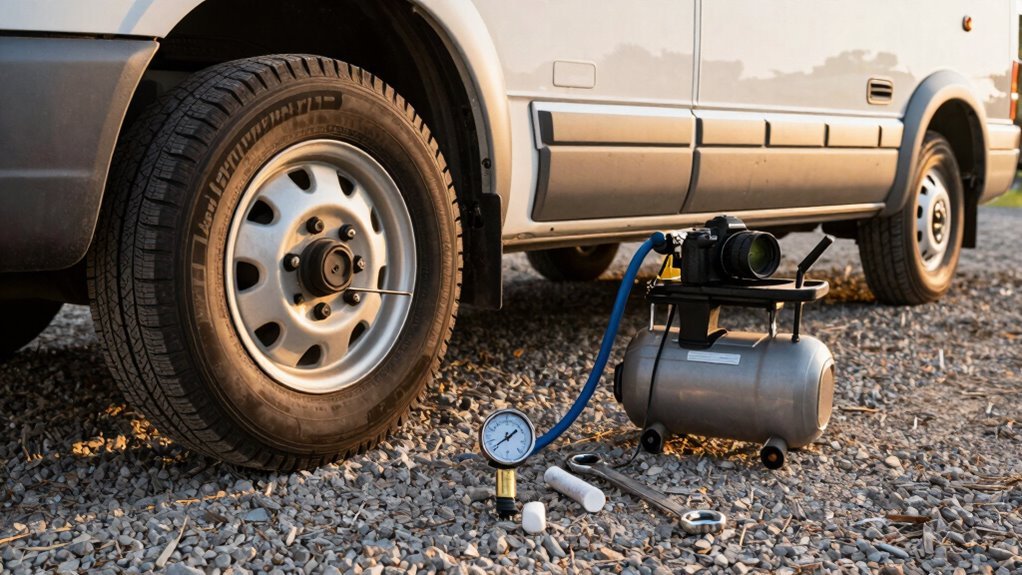
Kick off each season strong by giving your RV’s tires the attention they deserve—because nobody wants a blowout ruining their adventure. Check pressure monthly or before every trip using a heavy-duty gauge, and always measure cold tires—those sitting idle for at least three hours—so heat doesn’t trick you.
Keep them inflated to the recommended PSI; underinflated tires are the top cause of RV blowouts (and awkward roadside calls). Don’t forget the spare—it’s part of the team too!
Spin each tire and inspect tread depth: if Lincoln’s head shows clearly in a penny test, it’s time to say goodbye. Use a quarter to spot wear on heavier rigs—bald spots mean it’s time for new shoes.
Look for cracks, bulges, or embedded rocks while you’re down there. And hey, if you find a tire older than your favorite jeans (5–10 years), swap it out—age sneaks up fast!
Regular inspections help prevent breakdowns in the middle of nowhere.
Check and Clean Exterior Seals and Weatherstripping
Keeping water where it belongs—outside your RV, not inside your bedroom—starts with staying on top of your exterior seals and weatherstripping.
Check all seals every three months, especially on the roof, and do a thorough walk-around twice a year.
Look for cracks, shrinking, or gaps—especially around vents, windows, and AC units.
If you spot bubbles in wallpaper or soft spots near seams, act fast; that’s sneaky water playing hide-and-seek.
Remove old caulk completely—slapping new over old is like putting a bandage on dirty skin.
Clean the area with denatured alcohol or mild soap, then reseal on a warm, dry day.
Use non-sag sealant for corners and butyl tape if things are really falling apart.
Don’t forget to condition rubber door and wiper seals with 303 or Thetford—keep ‘em squishy, not crunchy.
Sun exposure and heat accelerate aging, so prioritize inspections after prolonged summer use.
A little love now saves a flood later.
Test and Service the Electrical System and Batteries
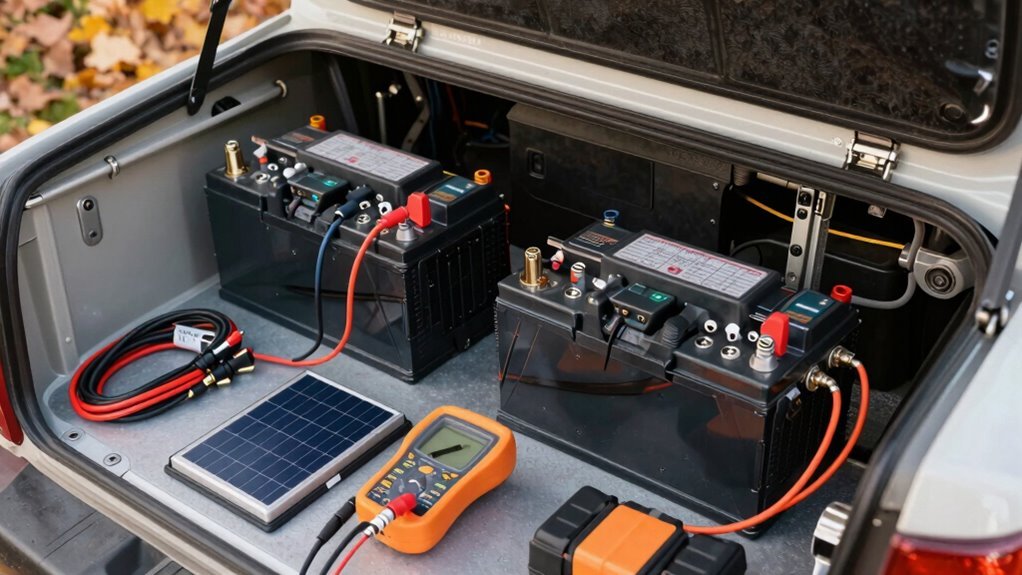
Now that you’ve sealed up any sneaky entry points and kept the rain where it belongs—outside your cozy little home on wheels—it’s time to shine a light on what keeps your RV humming: the electrical system.
Grab your voltmeter and check your house battery—it should read 12.7 volts or higher when fully charged.
Peek under the hood (well, the battery cover) for corrosion, leaks, or swelling, and clean those terminals if they’re looking crusty.
Don’t forget to top off non-sealed batteries with distilled water—tap water throws a party for mineral buildup, and nobody’s invited.
Make sure all connections are snug, wires aren’t frayed, and your power cord isn’t melting like a popsicle in July.
Test breakers, fuses, GFCI outlets, and your inverter-converter duo so you’re not left in the dark—literally.
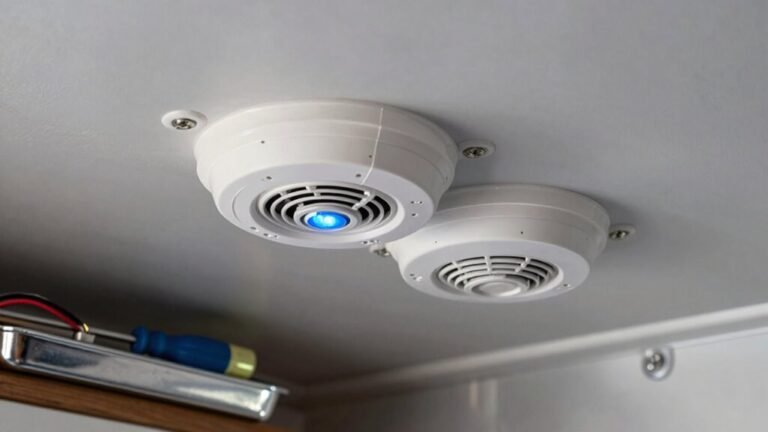
Test all smoke detectors, carbon monoxide detectors and LP gas alarms to ensure early warning protection in case of emergencies (smoke and CO detectors).
A little TLC now keeps the lights (and coffee maker) on later!
Examine Plumbing Lines and Fix Leaks Promptly
Ever wonder why your RV’s plumbing is like its circulatory system?
It keeps things flowing smoothly—until a leak throws a wrench in the works.
You’ve got to check those fresh water lines and connections regularly, buddy, because even a tiny drip can turn into a soggy disaster.
Run the water and watch for drips, especially at joints and valves—your leak detector might just catch what your eyes miss.
Don’t forget to inspect the city water hookup; a loose connection means wasted water and a soaked campsite.
If you spot a leak, fix it fast—no procrastinating!
And hey, while you’re down there, make sure your water pump isn’t leaking and delivers solid pressure.
Think of it as giving your RV a clean bill of health—nobody likes a leaky vein!
Inspect Roof and Flashing for Damage or Wear
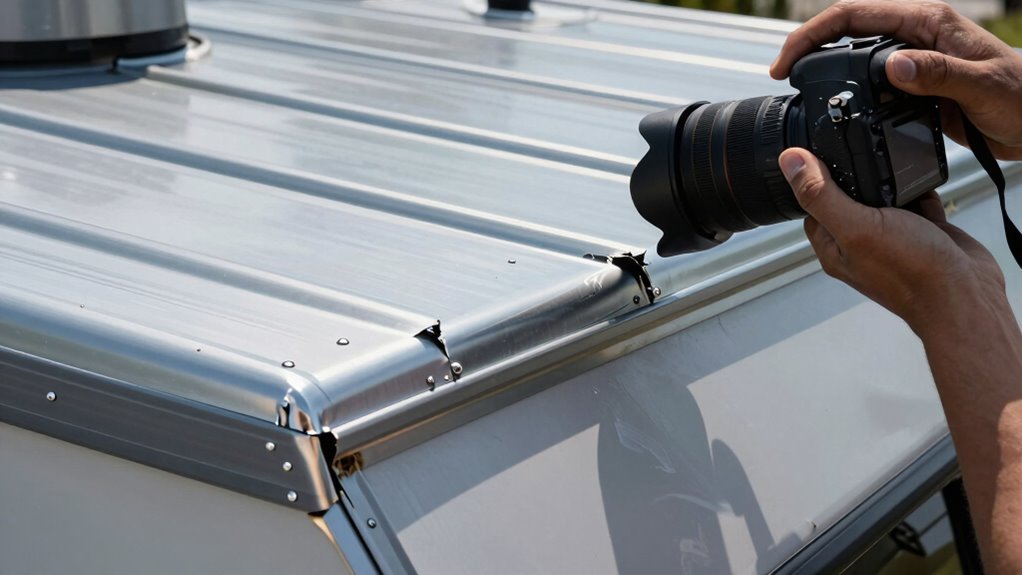
Spotting trouble on your RV roof before it spots you is the name of the game—think of it as playing detective with your own mobile home.
A little vigilance goes a long way in avoiding soggy ceilings and surprise leaks.
- That tiny crack? It’s not just waving hello—it’s an open invitation for water to crash your vacation
- Peeling sealant around vents or skylights? Don’t ignore it—moisture sneaks in like an uninvited guest during a storm
- Soft spots or bubbling roof material? They’re screaming for attention before your cozy camper turns into a swimming pool
Grab a soft brush, clean the surface, and give every inch a once-over after trips or seasonal changes. Your future self (and your dry socks) will thank you. With a solid roof overhead, you’re not just protected—you’re ready for any adventure, rain or shine.
Clean and Flush the Holding Tanks and Valves
Think of your holding tanks as the unsung heroes of your RV’s plumbing crew—they work hard, but they can’t do it alone. You’ve gotta clean and flush them right, or things get *interesting*—and not in a good way.
Empty your black tank when it’s half to three-quarters full, then give it a hot water soak with a buildup-stripping cleaner overnight.
Use your tank sprayer or a wand to blast away gunk from corners and sensors.
Don’t forget to rinse like you mean it—clear water means you’re winning.
For gray tanks, dish soap and enzyme treatments keep grease and gunk at bay.
Always close valves after dumping, and flush with plenty of water to protect seals and prevent stink.
And seriously, skip the ultra-thick toilet paper—your valves will thank you.
Stay on top of this, and your tanks will keep pulling overtime—silently, smoothly, and, well, smell-free.
Service the Air Conditioning and Heating Units
Keep your cool—literally—by giving your RV’s air conditioning and heating units some well-deserved attention. A few simple checks keep your climate control running strong, so you’re never stuck sweating (or shivering) on the road.
- Breathe easy: Clean or replace Merv 6–9 filters monthly—it’s like giving your AC a deep lung cleanse!
- Spark joy: A grime-free coil means cooler air and fewer “why is it so hot?!” moments. Clean it gently—we’re not power-washing a grill here!
- Stay leak-free: A cracked shroud or pesky squirrel nest? Fix it now before rain decides to join your indoor movie night.
Vacuum vents, clear ducts, and test that thermostat—all while laughing at how excited you’re about airflow.
Run a cooling test in spring and fall, and you’ll dodge surprise breakdowns.
Your future self, lounging in perfect comfort, will totally thank you.
Lubricate Slide-Out Mechanisms and Seals
Now that you’ve made sure your RV stays cool in the summer and toasty in the winter, let’s talk about something that glides just as smoothly as your climate control—your slide-outs.
Lubricating them isn’t glamorous, but it keeps things moving without a hitch.
Aim for at least three good lubes a year, or monthly if you’re always on the move—especially in dusty, salty, or snowy spots.
Use a dry, PTFE-based spray like CRC Power Lube to avoid attracting grime, and hit key spots: gear racks, motor shafts, bearings, couplers, and Gibb sections.
Clear out dirt with a dry or damp cloth before applying, and don’t forget to peek at seals twice a year.
A little flashlight check can save your floors from sneaky moisture.
Think of it as flossing for your RV—no one loves it, but it prevents big headaches!
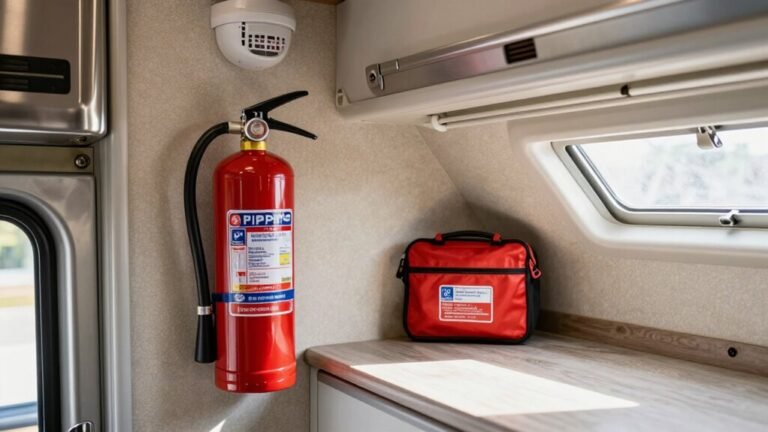
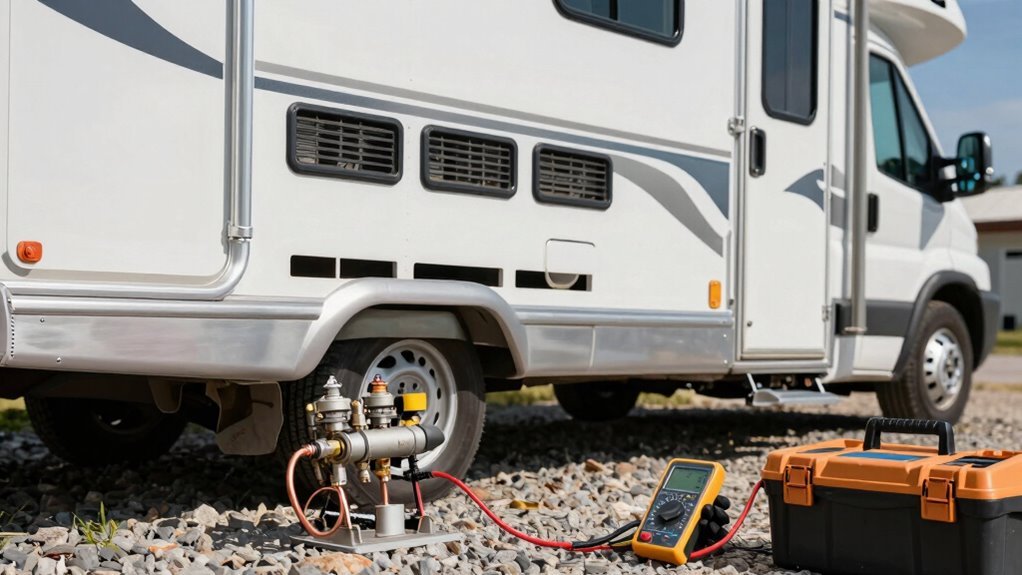
Verify Propane System Safety and Connections
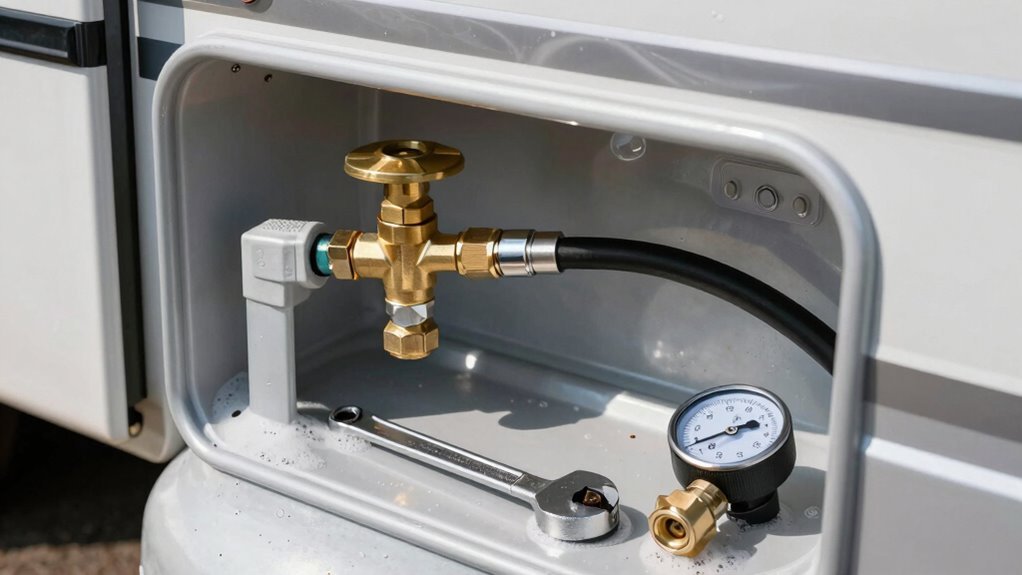
Checking your propane system isn’t just routine—it’s peace of mind on wheels. You want to know your family’s safe, your appliances work right, and you’re not inviting a surprise hiss into your adventure.
So take a few minutes because, trust us, cozy nights with the heater or pancakes on the stove are way better without a side of stress.
- Feel the relief of knowing your propane tank is secure, rust-free, and recertified—no ticking time bombs here!
- Smile through the soapy water test when bubbles stay put, proving your connections are tight and leak-free.
- Sleep soundly, knowing detectors are buzzing with life and your fire extinguisher’s ready—just in case Mr. Flame decides to crash dinner.
No dramas, no fumes—just safe, seamless RV living. And hey, who knew “check hoses” could feel this heroic?
Perform Brake and Suspension Inspection for Towing Safety
You’ve kept the inside of your rig cozy and fume-free—now let’s talk about what keeps you grounded when the road gets rambunctious.
Your brakes and suspension aren’t just parts—they’re your road guardians.
Check your brake pads—less than 1/4 inch? Time to swap ‘em.
Spin the rotors too; cracks, grooves, or a burnt look mean trouble.
Don’t forget to peek at lines and fluid—leaks or dark juice? Flush it out.
Your suspension’s no slouch either—bushings, U-bolts, and shocks need love too.
Wiggle test—loose bits mean danger.
Take it for a test roll: no wobble, pull, or scary sounds.
Oh, and your parking brake better hold on a hill—just in case Squirrel McGee tries to hitch a ride.
Check everything yearly—or every 12K miles if you tow heavy.
Stay safe, stay smooth, and keep that rig rocking!
Frequently Asked Questions
How Often Should I Replace RV Tires Regardless of Tread?
You should replace your RV tires every 3 to 5 years, no matter how much tread they’ve got left.
Seriously, even if they look fine, aging tires can dry rot and become dangerous.
Think of them like milk—just because they don’t smell bad yet doesn’t mean they’re safe.
For trailers, swap ‘em every 3 to 4 years, and check those date codes!
Safety first, road warrior!
Can I Use Household Cleaning Products on RV Interiors?
Nope, you’re playing with fire if you use regular household cleaners inside your RV.
They’re like bullies to delicate seals, gaskets, and tinted windows—causing cracks, haze, and toxic fumes.
Skip the bleach, ammonia, and scratchy powders.
Instead, grab vinegar, microfiber cloths, or RV-safe cleaners like Thetford or Bio-Kleen.
Your RV will stay fresh, shiny, and healthy—kind of like giving it a spa day, minus the drama.
Is It Safe to Leave My RV Plugged in Year-Round?
Yeah, you can leave your RV plugged in year-round—but only if you’ve got a smart charger.
Otherwise, you’re risking cooked batteries and nasty corrosion.
Think of your battery like a goldfish: it needs care, not just constant feeding.
Use a surge protector, check water levels monthly, and unplug now and then.
Your RV’ll thank you with longer life and fewer surprises—like not turning into a smoky surprise!
What’s the Best Way to Store an RV Long-Term?
You bet, the best way to store your RV long-term is in a climate-controlled, enclosed facility—your rig’s like a prized guitar, deserves that sweet protection!
You’ll block UV rays, pests, and weather drama.
Just prep it well: clean inside, drain pipes, fill the tank with stabilizer, prop doors open, and toss in moisture absorbers.
Your tires? Inflate ‘em, cover ‘em, or lift ‘em.
Boom—future road trips stay dreamy!
Should I Winterize My RV Even if I Use It in Winter?
Yeah, you should winterize your RV even if you use it in winter—especially if you’re hitting cold areas.
Think of it like wearing a jacket: better safe than frozen!
Skipping it risks busted pipes and messy repairs.
But if you’re moving often, consider quick winterizing between trips.
Stay proactive, protect your rig, and keep adventures stress-free.
Your RV (and wallet) will thank you later!
Conclusion
You’ve checked the tires, sealed the leaks, and juiced up the batteries—great! But wait, did you peek under the fridge for critters? One sneaky squirrel could turn your cozy getaway into a chewed-wire nightmare. Don’t let disaster nap in your RV. A little prep now saves a mountain of “uh-oh” later. So, what’s hiding in *your* rig? Grab that flashlight, adventurer—your next great trip’s counting on you. Stay safe, stay sharp, and roll out ready!
References
- https://435locals.com/keep-your-adventure-rolling-essential-rv-maintenance-checklist-from-the-pros-at-camping-world-st-george/
- https://thervsmith.com/rv-tire-inspection-checklist/
- https://roadside.goodsam.com/resources/pre-trip-inspection-checklist-for-rv-owners
- https://www.rv.com/servicing-care/how-to-perform-an-rv-tire-inspection/
- https://www.rv.com/servicing-care/safety-maintenance/rv-tire-safety-checklist/
- https://www.sunlandrvresorts.com/blog/rv-maintenance-checklist/
- https://blog.campersinn.com/blog/used-rv-inspection-list
- https://clemsonrv.com/essential-rv-maintenance-safety-checklist/
- https://www.youtube.com/watch?v=CzSytJ4WrHQ
- https://www.youtube.com/watch?v=aGUcT1TBj98