How to Prevent RV Black Tank Odors
Keep that toilet seal wet with at least an inch of water—dry seals lead to RV black tank odors, plain and simple. This simple step helps maintain a strong barrier against stink.
Use enzyme-powered treatments like Camco Rhino or Happy Campers to break down waste and eliminate nasty odors. These products target the source of RV black tank odors instead of just masking them.
Dump the tank every few days, especially in hot weather, to prevent buildup and odor development. Always rinse the tank thoroughly after emptying to keep it clean.
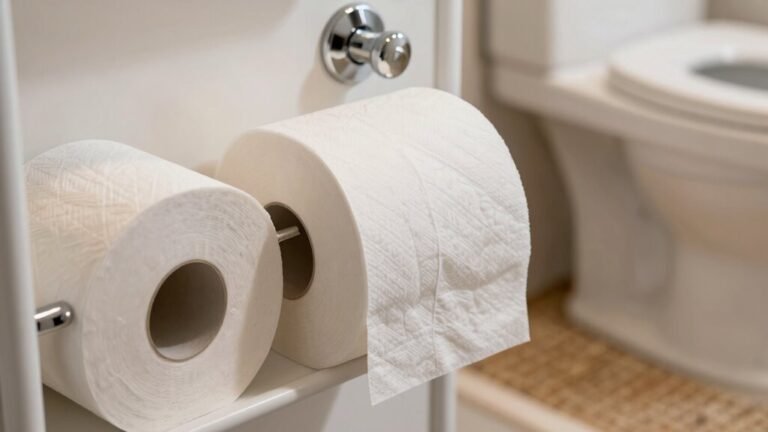
Flush only RV-safe paper to avoid clogs and odor-causing waste buildup. Seal the toilet base with fresh caulk to prevent leaks and lingering smells.
Check that your roof vent is clear and allows proper airflow. Good ventilation helps control RV black tank odors by releasing gases outside.
Use the Right Black Tank Treatment
Tackle that smelly black tank head-on by choosing the right treatment—because let’s face it, nobody wants their RV to double as a portable biohazard zone.
You’ve got options, and the good news? Enzyme-based picks like Camco Rhino and RV Digest-It Ultra crush waste and toilet paper fast, slashing clog risks.
If cold weather’s your nemesis, Camco TST Max won’t quit on you.
Prefer eco-safe solutions? Go for Star Brite or Happy Campers—both ditch formaldehyde and play nice with the environment.
Just Science Probiotic’s smart blend even fights pesky struvite crystals.
For hot climates, Walex Bio-Active keeps smells in check, while Liquified wins kudos for turning sludge into liquid gold—well, sort of.
Pick a top performer, follow dosing tips, and laugh in the face of stink.
Your nose will thank you. Many effective treatments are 100% biodegradable, ensuring they’re safe for septic systems and the environment.
Always Keep Water in the Toilet Seal
Keeping water in the toilet seal isn’t just smart—it’s your secret weapon against surprise stink attacks.
That little inch of water sitting in the bowl? It’s doing heavy lifting, forming an airtight barrier that blocks nasty black tank odors from creeping into your cozy RV interior.
Without it, smells sneak through like uninvited party crashers.
Always keep at least an inch of water in the bowl, especially when parked. If it evaporates, just add more—easy fix!
A dry seal means cracked rubber, leaks, and stinky air slipping past.
Check it after flushing, winterizing, or long storage.
Lubricate it once a year to keep it flexible, and inspect for cracks or dryness.
When needed, swap it out—RV stores have affordable replacements, and the upgrade’s a breeze.
A happy seal means a fresh RV. So give that water a second glance—it’s your silent, stink-fighting hero!
This simple step works because the seal relies on water to maintain an airtight rubber seal with the black tank below.
Empty the Tank at the Right Time
Timing your black tank dump just right keeps things flowing smoothly—literally.
Empty when it’s about two-thirds full—this keeps enough liquid to move solids without letting gunk stick to the walls.
Don’t wait until it’s completely full, or you’ll risk clogs and a messy battle later.
And hey, skipping daily dumps is smart—your tank needs that liquid to help everything slide out clean.
Aim to dump every 3–5 days during trips, even if it’s not totally full, especially in hot weather when stink levels rise fast.
Always go before a long drive to stop the swamp slosh.
And remember: black tank first, then gray—let that soapy water rinse the hose clean.
You’ve got this!
Just treat the tank after, close the valve, and keep things flowing like a pro.
Dump when tank is about two-thirds full to maintain optimal liquid-to-solid ratio for efficient draining.
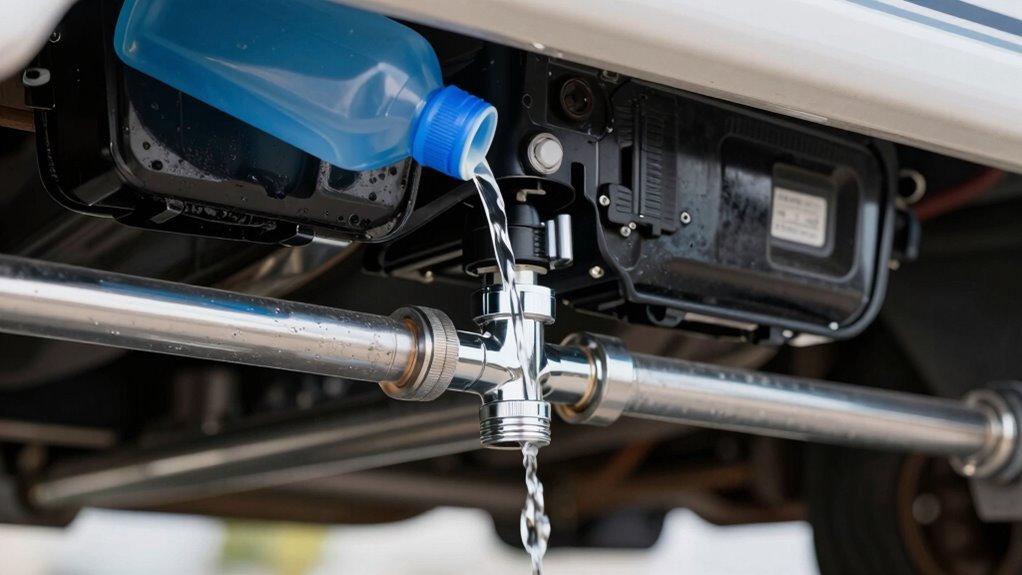
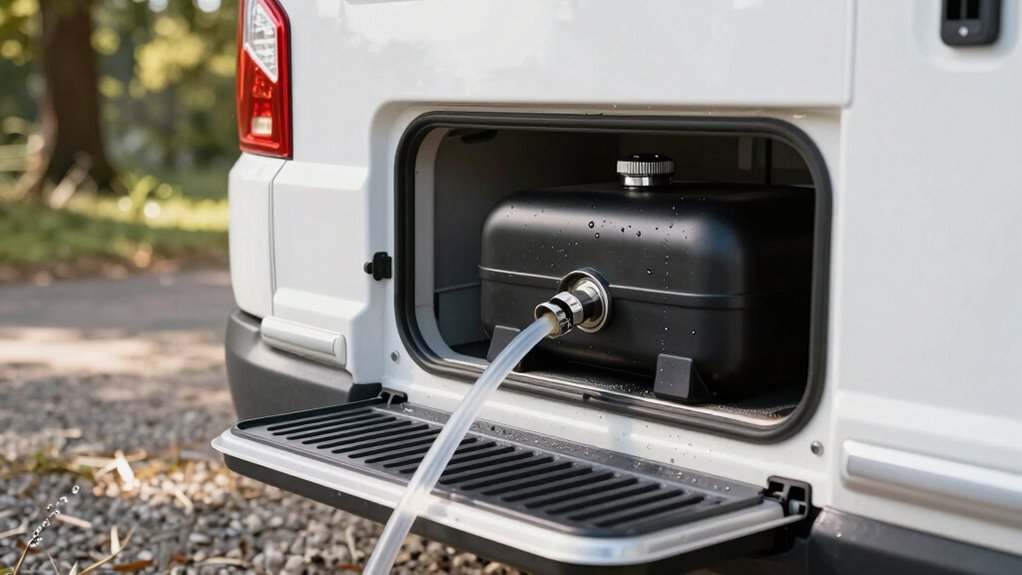
Rinse the Tank Thoroughly After Dumping
Flush away the funk and keep your black tank fresh by giving it a good rinse right after dumping—think of it as a spa treatment for your RV’s not-so-glamorous side.
Attach a dedicated hose to the marked black tank flush valve, and let fresh water surge in to blast away gunk.
Use clear sewer extensions so you can actually *see* when the tank’s empty—no guesswork needed.
Once the black tank’s fully drained, pump in about four full toilet-tank’s worth of water to swish everything clean.
Keep rinsing until the outflow runs clear; that’s your sign it’s squeaky clean inside.
Skip this step, and you’ll invite odors and clogs to move in uninvited.
Most modern RVs come with built-in flush systems, so take advantage!
Rinse thoroughly every time—it’s quick, easy, and keeps your system running smoothly.
Your nose will thank you later.
Avoid Flushing Non-Biodegradable Items

You just gave your black tank a spa-worthy rinse, so let’s keep that freshness rolling by talking about what *never* should go in there—because your RV’s plumbing isn’t a magic trash disposal.
Flush only human waste and RV-safe toilet paper, nothing else.
That means no wipes, not even “flushable” ones—yeah, they’re liars.
No dental floss, condoms, cigarette butts, or food scraps either.
They don’t break down and love to clog your system.
Skip thick, scented, or quilted toilet paper; it’s like kryptonite for tanks.
Test your TP by soaking a chunk in a bucket—watch it dissolve like a magic trick, or fail miserably.
And remember, your tank’s got helpful bacteria working overtime, so don’t sabotage them with trash.
Keep it clean, keep it simple, and your nose will thank you later.
Think of it as a “no junk in the trunk” policy—for real.
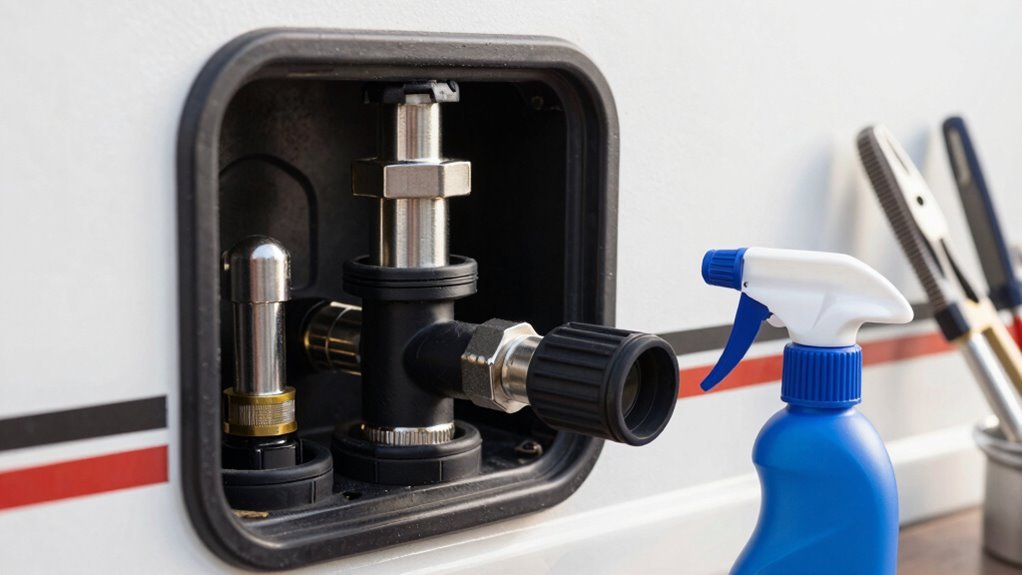
Seal Potential Odor Entry Points
While your black tank might be the unsung hero of your RV’s plumbing, it can turn into a stinky troublemaker if even the tiniest gap lets odors slip through—so let’s seal those sneaky entry points like pros.
You’d be surprised how fast a small leak or loose fitting invites unwanted bathroom smells into your cozy rig.
Stay ahead of the stink with these key moves:
- Inspect and reseal toilet base with silicone caulk and a fresh wax ring—no wobbles, no whiffs.
- Lubricate and test dump valve seals using silicone spray and dielectric grease to keep leaks at bay.
- Caulk, tighten, and replace worn gaskets around access doors, pipe fittings, and sensors—plug every hole.
A little DIY love goes a long way, and your nose will thank you.
Plus, nobody wants to ask, “Is it me or the RV?” (Spoiler: It’s the RV—until now!)
Maintain Proper Ventilation With the Roof Vent

A whiff-free RV isn’t just about sealing up trouble spots—it’s also about keeping the air moving like a cool breeze on a summer road trip.
You’ve got to let your RV breathe!
Roof vents kick out hot, stinky air and pull in fresh airflow, so your space stays comfy and odor-free.
Whether you’ve got a manual vent or a smart one with remote controls, make sure it’s doing its job.
Hot air rises, so your roof vent is the perfect exit ramp for steam, smells, and moisture.
Without good airflow, mold and mildew throw uninvited parties in your walls.
Clean out leaves, bugs, and gunk blocking the vent—nature loves to crash your RV.
Use vent covers to block rain and UV damage while letting air zip through.
Two vents? Even better!
Fresh air in low, stale air out high—science has your back.
Keep it flowing, and your nose will thank you!
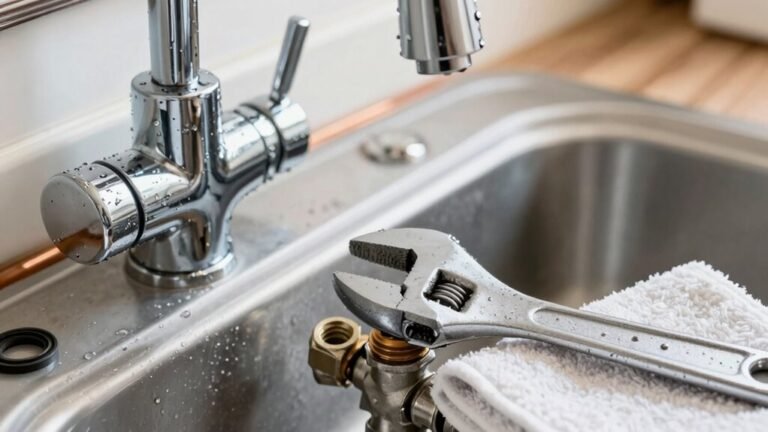
Inspect and Clean the Dump Valve Regularly
Grab your gloves and get ready—your dump valve’s due for a spa day!
Cleaning and inspecting it regularly keeps odors out and function smooth.
Start by wiping down the area around both flanges, checking for cracks or cuts—replace them if they look worse than your last haircut.
Use a mild detergent to scrub off gunk, then rinse well.
For deeper cleaning, open the valve gate and soak it (but not the electronics!) in a mix of warm water and half a bottle of Sensor Power—think of it as a hot tub for your valve.
After soaking, lubricate seals and the stem with silicone spray, never WD40.
Work the handle back and forth to spread it evenly.
- Test for leaks by refilling the toilet and watching for drips.
- Inspect O-rings, cables, and housing for rust or cracks.
- Cycle the valve open and closed to make sure it’s running right.
A little TLC now prevents stinky surprises later!
Frequently Asked Questions
How Often Should I Completely Drain My Black Tank?
You should completely drain your black tank every 3 to 5 days if you’re using it regularly—don’t wait until it’s totally full.
Aim to empty it when it’s about two-thirds full to keep things flowing smoothly.
Doing it weekly works for two people, but bigger groups might need to dump every other day.
This keeps waste breaking down properly, prevents clogs, and stops yucky buildup from turning your tank into a science experiment.
Can I Use Household Cleaners in My RV Toilet?
No, you shouldn’t use household cleaners in your RV toilet—they’re tough on delicate parts, unlike rugged home fixtures.
Harsh stuff like bleach can wreck seals, fade plastic bowls, and kill helpful tank bacteria.
But hey, don’t sweat it!
Grab an RV-safe cleaner instead, like Ecos or Thetford.
They scrub clean without the drama, keeping your system happy, odor-free, and ready for the next adventure—because nobody likes a surprise leak at 2 a.m.!
Is It Safe to Leave the Black Tank Open While Camping?
No, you shouldn’t leave your black tank valve open while camping—it’s a smelly mistake waiting to happen.
You’ll drain all the liquid, leaving solids to pile up and dry, creating stinky pyramid plugs.
Sewer gases might even sneak back into your RV, and hello, nasty odors!
Keep the valve closed until it’s time to dump.
Trust me, your nose will thank you later—nobody wants a mobile methane museum on wheels!
What Causes Gurgling Sounds in the RV Toilet?
You hear gurgling when your RV toilet battles clogs, fights vent blockages, or struggles with full tank trouble.
You’ve got airflow issues, drainage drama, or a black tank crying for help.
Leaves, wipes, or buildup are likely culprits.
It’s like your plumbing’s throwing a tantrum—give it attention before it flushes back!
Keep vents clear, tanks monitored, and drains happy.
Simple fixes save big headaches later.
Should I Close the Black Tank Valve Before Filling It?
Yes, you should close the black tank valve before filling—it’s a game-changer!
Trapping water inside lets it rise high enough to really clean the tank when you dump.
Cracking it open slowly creates a powerful flush that clears gunk like a mini-tornado.
Just watch the monitor so you don’t overflow, unless you enjoy explaining sewage showers to your camping buddies!
Conclusion
You’ve got this, RV pro! Did you know80% of smelly black tanks come from skipping tank rinses after dumping? Yikes! So, give that tank a good flush, keep water in the seal, and toss only the right stuff. Seal gaps, check the valve, and let that roof vent breathe free. A little love goes a long way—hello, fresh trails and zero stink! Keep rolling, odor-free.
References
- https://www.rvupgradestore.com/blog-best-rv-black-tank-treatments-s/1242.htm
- https://www.youtube.com/watch?v=iTo36_zgLkk
- https://uniquecampingmarine.com/blogs/news/the-best-rv-black-tank-treatment
- https://www.neighbor.com/storage-blog/rv-black-tank-treatment/
- https://bjc-rv.com/2023/10/the-best-holding-tank-treatment
- https://roadtrippers.com/magazine/rv-toilets-black-tank-faq/
- https://blog.campingworld.com/learn-to-rv/5-tips-for-maintaining-your-rv-toilet/
- https://camcooutdoors.com/blogs/news/blog-essential-tips-for-maintaining-your-rvs-black-water-tank-09d15f
- https://olivertraveltrailers.com/forums/topic/6118-toilet-to-black-tank-seal-issue-resolved-closing-this-post/
- https://www.youtube.com/shorts/ywjxxUH1y1I