How to Increase Water Pressure in Your RV
To increase water pressure in your RV, start by turning on the spigot and checking your hose for kinks—flat spots can quickly kill water flow. Clean the filter and inspect the regulator, aiming for a pressure of 45 PSI, which is ideal for most RV systems.
Flush out any buildup from the tank and water lines to remove blockages that may be restricting flow. Don’t overlook grimy aerators; soaking them in vinegar can restore proper pressure.
If you find a leak, repair it immediately to maintain consistent water pressure. Have someone inside the RV check for drips while you test the system—teamwork makes troubleshooting easier. Still looking for ways to increase water pressure in your RV? More solutions are within reach.
Check Your Water Source Connection
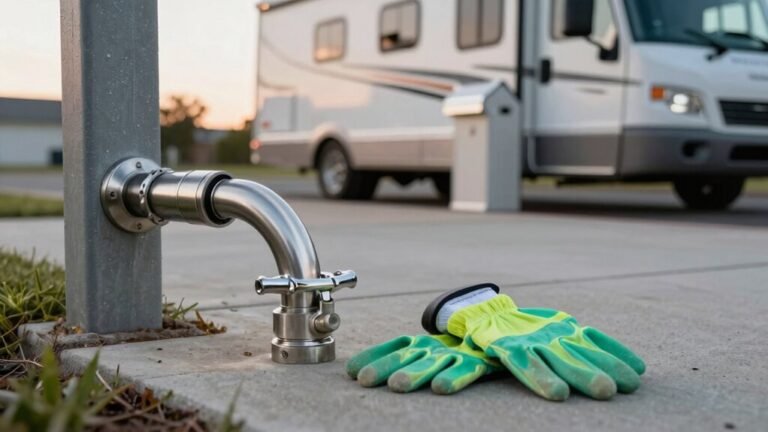
Ever wonder why your morning shower feels more like a drizzle than a downpour? Start by checking your water source connection—you’re in control here!
Turn off the spigot, unscrew your RV hose, then turn it back on. Watch that stream—does water flow strong and steady, or does it sputter like a tired lawn sprinkler?
If it’s weak, the campground post might be the culprit.
Make sure the handle opens all the way; sometimes it’s just stuck mid-sip.
Test it a few times—issues can come and go like uninvited campfire guests.
While you’re at it, inspect the hose: no kinks, cracks, or mysterious flat spots.
A damaged hose strangles flow faster than a bear hug.
And yep, reconnect it snugly—loose fittings leak power, literally.
Get this right, and boom—you’re already winning the pressure battle before it starts!
Also, ensure the pump is on to maintain consistent water pressure throughout the system.
Inspect and Clean Your Water Filter
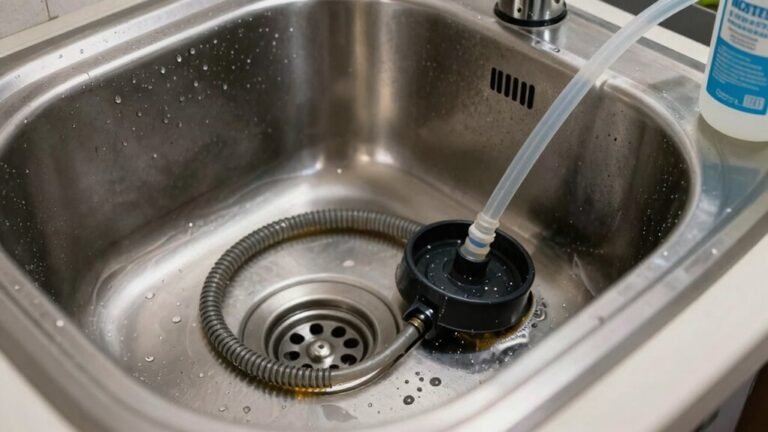
Keeping your RV’s water flowing strong starts with a little filter TLC—and yep, that means diving into the nitty-gritty of your water filter.
First, shut off the pump and unhook the water supply—safety first!
Find the filter housing near the city water inlet or freshwater tank.
Peek for cracks, leaks, or gunk.
Pull out the cartridge and check for gunk—discolored or clogged?
Time to clean or replace it.
Unscrew the housing, pop out the screen and O-rings, and lay everything on a clean towel.
Rinse parts with warm water, scrub gently with soapy sponge or vinegar, and vacuum the strainer if needed.
No harsh scrubs—keep stainless steel happy!
Let parts air dry (but not the filter!).
Reassemble snugly—no Hulk-mode on the threads—and turn the pump back on.
No leaks? Nice!
Do this every 3–6 months, depending on how much you roam.
Your water pressure will thank you—seriously, it’ll *sing*.
Improper care can lead to bacterial growth, so always ensure components are thoroughly dried and stored properly when not in use to prevent bacteria, mold, or algae growth.
Examine the Water Pressure Regulator
Now that you’ve given your water filter some well-deserved attention, it’s time to shift focus to another quiet hero of your RV’s water system: the pressure regulator.
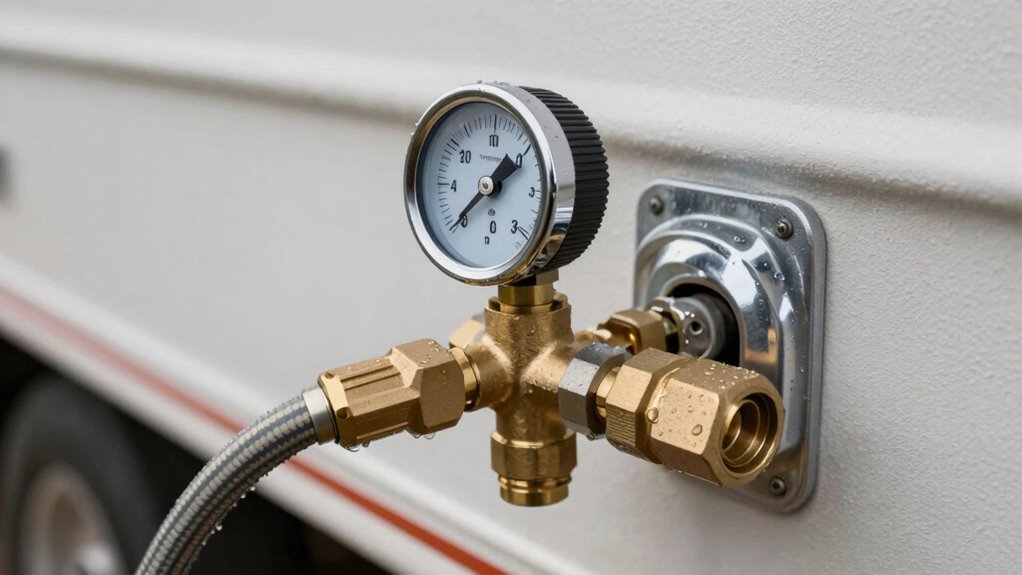
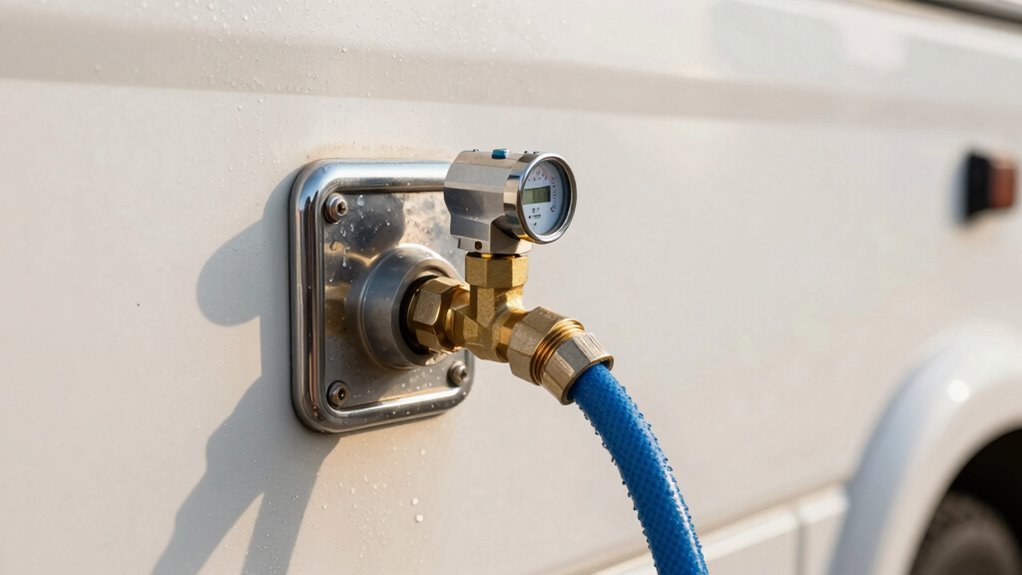
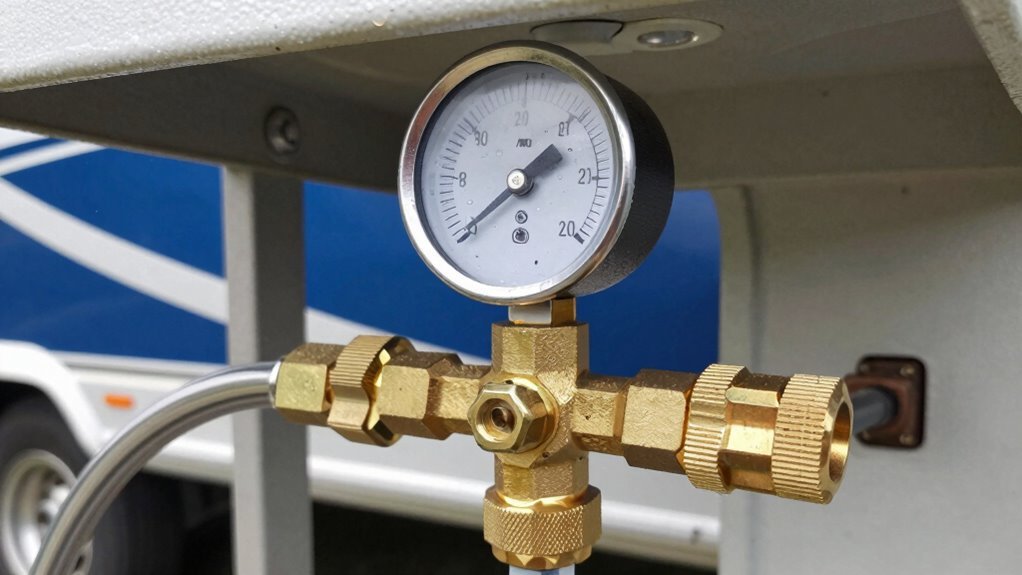
This little gadget keeps your plumbing happy by taming wild campground water pressure, usually dropping it to a safe 40–55 PSI.
Without it, you’re risking leaks, busted hoses, or even a surprise indoor fountain from a burst pipe—no one wants that.
Most regulators come preset at 45 PSI, but you can tweak them up to 55 with a screwdriver if needed.
Install it right at the spigot before your hose, and pick one with a gauge so you can actually see what’s going on.
Brass models from brands like Camco or Valterra last longer and laugh in the face of rust.
Check it regularly, store it safely, and your RV’s pipes will thank you with decades of drama-free service.
Seriously, this tiny part’s a powerhouse.
Campground water sources often have higher pressure than RV plumbing can handle, making a regulator essential for preventing damage. Excessive pressure can lead to leaks or bursts in pipes and fixtures.
Flush Out Sediment From Plumbing Lines
Flushing out gunk from your RV’s plumbing isn’t the most glamorous job, but it’s a game-changer for keeping your water clean and flowing smoothly.
Start by draining your fresh water tank completely—pop open that twist valve and let it all out.
Use a cleaning wand to rinse the tank and dislodge gunk, then refill and flush again until the water runs clear.
For your water heater, drain it first, then blast the inside with a wand to knock loose sediment.
If things are crusty, try a gravity-fed vinegar soak—6 gallons should do the trick.
Vacuum out the muck with a shop vac and wet filter, and don’t forget to check filters and P-traps.
A little elbow grease now keeps your water tasting fresh and your pressure steady.
Trust us, your morning shower will thank you!
Look for Kinks or Blockages in the Hose

After you’ve chased the gunk out of your plumbing and your water runs as clean as a whistle, it’s time to follow the trail a little further—right into the hose.
Grab a flashlight and check the whole line from tank to pump—you might find a kink hiding like a sneaky gremlin.
Look near the fresh water drain; it’s a kink hotspot thanks to tight underbelly turns.
Don’t ignore your campsite hose either—flatten it by accident, and boom, weak flow.
If needed, drain the tank, peek under the RV, and cut an access door to spy hidden bends.
Unkink it, add a longer hose loop, and tape it in place.
Reconnect, refill, and test the flow—no more dribble!
Use kink-resistant hoses and leave some slack—they’re like yoga pants for your plumbing.
And hey, if your hose looks sad and squished, give it a break.
Your shower will thank you.
Clean Aerators on Faucets and Showerheads
Ever wonder why your shower’s gone from invigorating cascade to sad sprinkler?
It’s probably your aerators clogged with gunk.
When water sputters, sprays sideways, or feels weak—even when the supply’s fine—it’s time to check those little screens.
You might even see crusty mineral buildup around the faucet.
Grab a wrench (or use pliers wrapped in cloth) and twist the aerator off counterclockwise.
If it’s recessed, snag a special cache wrench—forcing it could break things.
Pop the parts in white vinegar for 30 minutes (or overnight for tough crud), then scrub with a soft brush.
Use a needle to poke through any blocked holes.
Rinse well, reassemble by hand, and don’t over-tighten!
Clean every 3–6 months to keep things flowing smoothly.
Your shower will thank you—and so will your dishes.
Install a Water Pressure Booster Pump
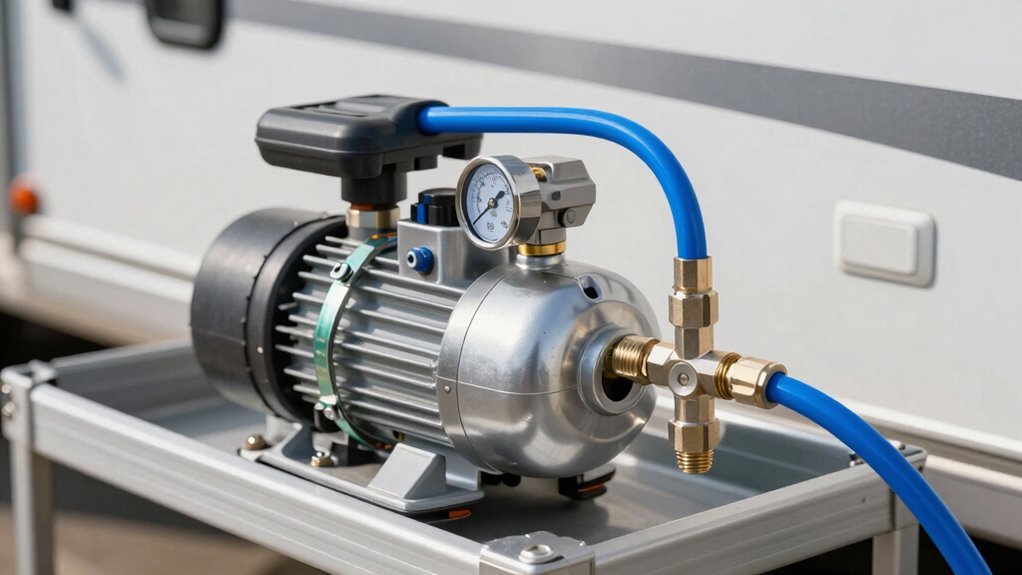
You’ve cleaned the aerators and still feel like your shower’s running on empty? Time to install a water pressure booster pump!
Pick the right one—like the Shurflo 4008 for small RVs or the beefier 4048 for big rigs with multiple fixtures.
Need more oomph from city water? Try the Flojet inline booster for a 10–20 PSI kick.
Mount it near an outdoor power outlet, between the spigot and your rig, using flexible pipes and brass 3/4-inch fittings.
Don’t forget Teflon tape on threads and isolation valves for easy fixes.
Secure it with straps, add foam padding to quiet vibrations, and plug it in.
Power up, open the highest faucet, and let the pump prime.
Most have smart sensors—just turn it on and enjoy steady 50 PSI flow.
Who knew strong showers could be this simple? Your hair will thank you!
Test for Leaks in the Freshwater System
Grab your flashlight and put on your detective hat—time to crack the case on sneaky leaks in your RV’s freshwater system! A little drip mightn’t seem like a big deal, but it can wreck pressure fast. Don’t let hidden leaks turn your cozy camper into a damp mystery. Here’s how to sniff them out like a pro:
- Watch the pump: Turn it on with all faucets off—if it keeps kicking on and off, you’ve got a leak somewhere.
- Follow the clues: Check under sinks, smell for mustiness, look for soft floors or cracked seals, and listen for hissing during an air pressure test.
- Play water detective: Use a garden hose on suspect roof spots while someone inside checks for drips—teamwork makes the dream work!
Stay sharp, stay dry, and keep that water pressure strong!
Frequently Asked Questions
Can Water Pressure Issues Damage My Rv’s Plumbing Over Time?
Yeah, high water pressure can definitely wreck your RV’s plumbing over time.
It’s like giving your pipes a daily workout they didn’t sign up for—soon they crack, leak, or burst.
Fixtures wear out fast, your water heater gets stressed, and you’ll hear scary bangs in the walls.
Keep it under 60 PSI, or you’re basically inviting chaos with every faucet flip.
Is It Safe to Use a Home Water Pressure Gauge on My RV?
Yes, you can safely use a home water pressure gauge on your RV—those 3/4″ threads fit perfectly, no tinkering needed.
They’re built for the same American water systems your RV uses, so it’s like they were made for each other.
Just screw it on, turn the water on, and boom—real-time pressure readings.
Just don’t forget to check for leaks, unless you’re into unexpected indoor waterfalls!
How Often Should I Replace My Rv’s Water Pressure Regulator?
You should replace your RV’s water pressure regulator every 3 to 5 years—think of it like changing your toothbrush, but for plumbing!
If you spot leaks, odd pressure, or gunk buildup, swap it sooner.
A quick check each season keeps surprises at bay.
Plus, hand-tightening is easy, so you won’t need a plumber’s salary.
Stay proactive, and your RV’s pipes will thank you with smooth, splashy performance!
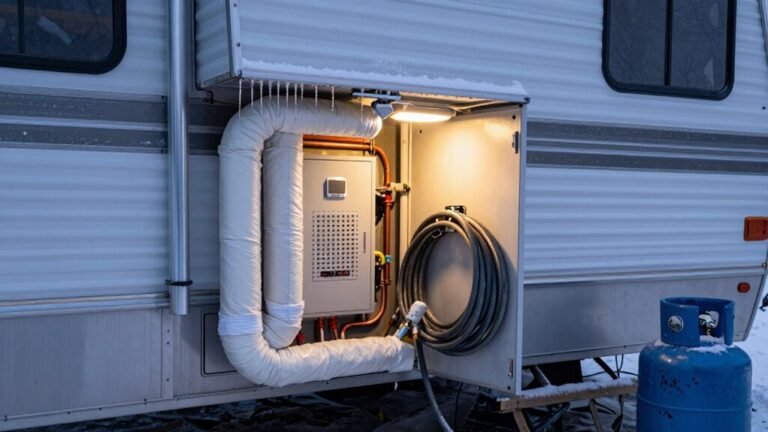
Can Freezing Temperatures Affect My Rv’s Water Pressure Performance?
You bet freezing temps can wreck your RV’s water pressure—don’t think “it won’t happen to me”!
When it dips below 32°F, water in pipes, tanks, and hoses turns to ice faster than you can say “brrr,” blocking flow and busting lines.
Even your pressure regulator can freeze solid, killing water pressure overnight.
Stay warm, stay flowing: insulate, heat, and disconnect.
Ice ain’t nice—keep it out!
Does Water Pressure Impact My Rv’s Water Heater Efficiency?
Yes, water pressure directly impacts your RV’s water heater efficiency—too low, and your tankless heater won’t even kick on, leaving you cold.
Too high, and you risk leaks or damage.
You want that sweet spot between 40–55 PSI, especially if you’re running a tankless system that craves 50–55 PSI.
Think of it like coffee—just right pressure brews perfection, while wild swings? That’s a plumbing nightmare in the making!
Conclusion
You want power, not a trickle. So check connections, clean filters, and chase kinks like a detective on a mission. Flush lines, scrub aerators, fix leaks—boom, pressure’s up! If it’s still shy, boost it with a pump that means business. Simple fixes, big results. Your shower’s no longer a sad sprinkle, but a full-on downpour. Problem solved, adventure on—because nobody camps for the weak faucet show.
References
- https://blog.campingworld.com/learn-to-rv/rv-water-pump-not-working/
- https://www.youtube.com/watch?v=aF92WXFJqrc
- https://www.youtube.com/watch?v=9gzAarz6og0
- https://www.millsupply.com/blog/how-to-troubleshoot-common-rv-plumbing-problems/
- https://goblutech.com/blogs/main/how-to-properly-store-your-rv-water-filtration-system
- https://www.happilyeverhanks.com/blog/7jq6jpsut177dazhfn8roi60eu84ii
- https://nuvoh2o.com/blog/tips-for-properly-maintaining-and-cleaning-your-rv-water-treatment-system/
- https://www.lippert.com/blog/rv-maintenance-checklist
- https://rvservices.koa.com/rvinformation/rvmaintenance/rv-water-filters/
- https://www.youtube.com/watch?v=XGW1EfHg_Co