How to Set Up a Weight Distribution Hitch
To set up a weight distribution hitch, start by selecting one that matches your trailer’s tongue weight, which should be 10–15% of its fully loaded weight. Make sure the hitch is compatible with your trailer and vehicle setup for optimal performance.
Attach the weight distribution hitch to your vehicle’s receiver using the appropriate ball mount with the correct rise or drop. This ensures the trailer will sit level once connected.
Slide the spring bars into the brackets and secure them in place with the retaining pins. Then, attach the lift chains, leaving a few links dangling to allow for proper tension later.
Once the hitch is assembled, connect the trailer and verify that the coupler locks securely over the trailer ball. Use a level to check that both the trailer and towing vehicle sit evenly from front to back.
Adjust the chain tension by shortening or lengthening them until the tow vehicle and trailer ride level. Properly setting up a weight distribution hitch enhances stability, control, and safety on the road.
Choose the Right Weight Distribution Hitch System
Ever wonder why your trailer doesn’t feel like it’s trying to swallow your tow vehicle whole? That’s because you’re using the right weight distribution hitch!
You need to size it right—aim for 10–15% of your trailer’s total weight on the tongue, including all that stuff packed up front. Too much, and your hitch sags; too little, and things get wobbly.
Grab a loaded tongue weight measurement before picking a system.
Match it to your trailer’s GVWR—say, 6,000 lbs—and pick a hitch that can handle it, like a 17K or 18.5K model.
You’ve got choices: trunnion bars for stability, round bars for a smoother ride.
Want rock-solid control? Go for one with built-in sway magic.
Pick a top performer like Equal-i-zer or Blue Ox, and you’ll tow with confidence, not chaos.
Sweet ride, right? A properly sized system ensures balanced weight distribution across both axles for improved handling.
Attach the Hitch Head to the Receiver
Sliding that shank into your receiver is your first real step toward hitching up like a pro, and trust us—it feels good to get things moving.
Line up the holes, pop in the hitch pin, and lock it with the clip so nothing wiggles loose.
Flip the shank up for rise or down for drop, depending on your vehicle’s height—think of it as giving your rig the perfect pair of shoes.
Next, dry-fit the hitch head onto the shank like you’re test-driving a hat.
Slide on that conical washer, add the hex bolt, and toss in five spacer washers if you’re using Equal-i-zer.
Don’t crank it down yet—just snug it by hand.
You’re not sealing a vault, just prepping for perfection.
Get it close, keep it level, and remember: patience now means no surprises later.
You’re not just bolting metal—you’re building confidence, one solid connection at a time.
A tape measure ensures proper alignment during setup.
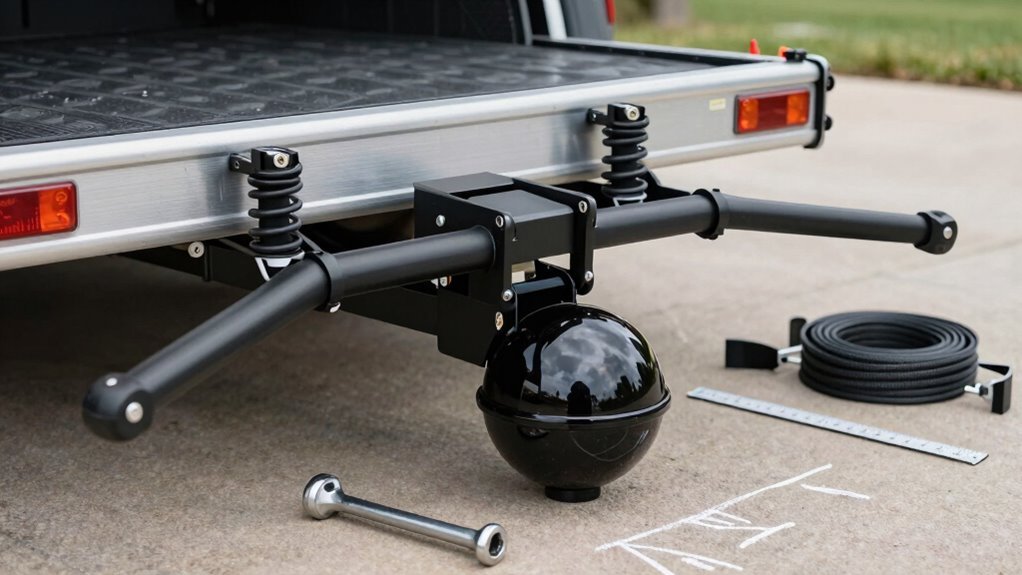
Install the Spring Bars and Chains
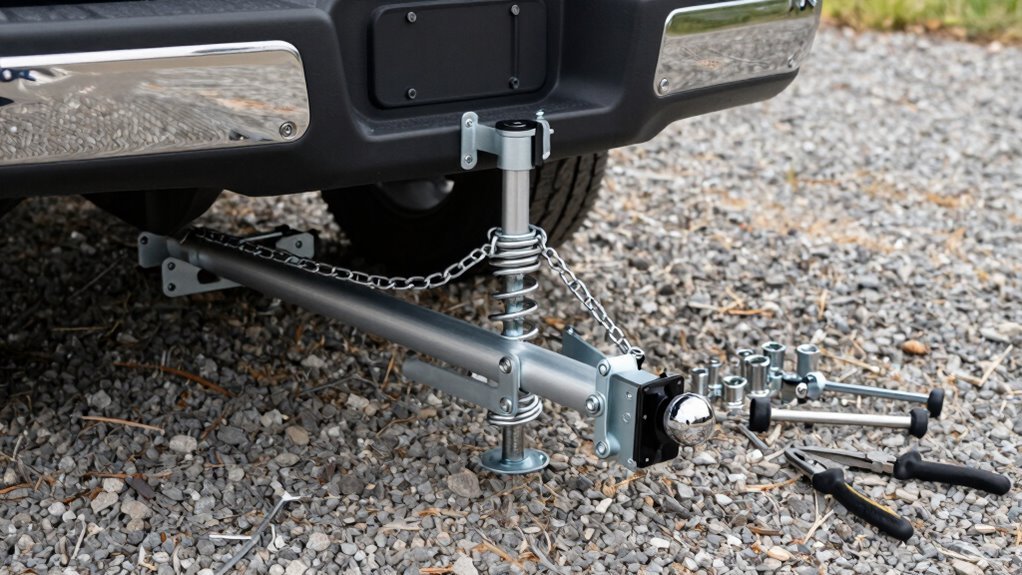
Now that you’ve got the hitch head snug on the shank and everything’s sitting level, it’s time to bring in the muscle—those spring bars and chains that’ll keep your trailer steady and your ride smooth.
Here’s how to nail it:
- Slide the spring bars into the hitch head from below, then rotate them up until they click—listen for that *bing!* of success.
- Pop the retainer disks into the bushings to lock the bars in place—because nobody likes a flying bar at 60 mph.
- Hook the chains to the bar ends and attach them to the frame brackets, leaving 5 or 6 links dangling below as your starting point.
- Make sure the chains hang straight and the bars stay parallel to the trailer tongue—no crooked smiles here!
A little grease, the right tools, and a sense of pride—now you’re distributing weight like a pro. Apply a small dab of grease to the retainer disc before inserting it to ensure smooth disc seating.
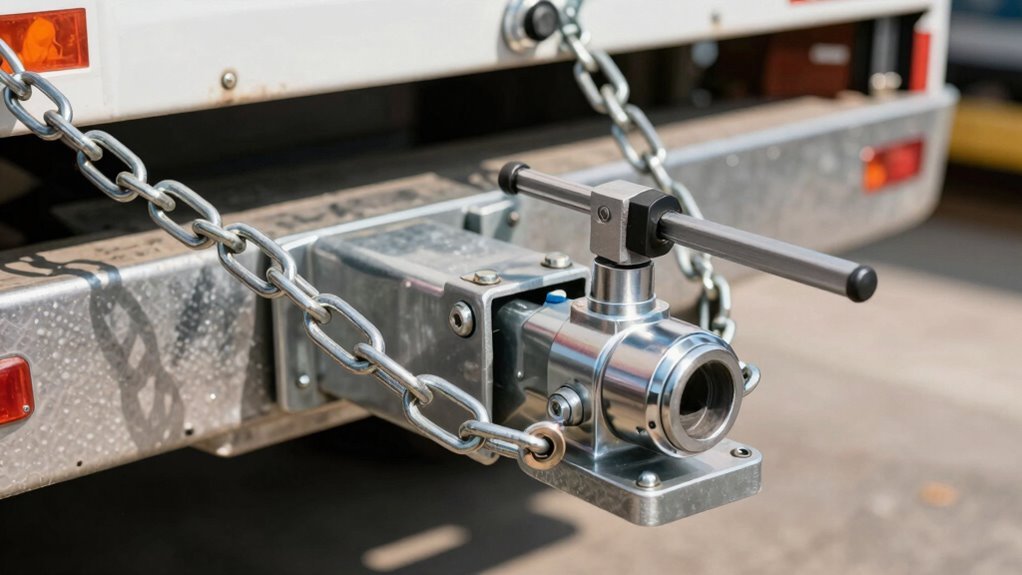
Mount the Trailer Ball to the Hitch Head
Grab your trailer ball and let’s get it locked down—this little hero’s about to hold thousands of pounds steady behind your rig, so let’s make it count.
First, double-check that your ball size matches both the trailer coupler and hitch ratings—no guessing!
Slide it into the hitch head, shank snug in the socket, then add the lock washer and hand-tighten the nut.
Don’t torque it yet—you might need to flip the head to the right drop or rise for level towing.
Once it’s aligned, grab your torque wrench: 160 ft-lbs for a 3/4-inch shank, 250 for 1-inch, and 450 for 1-1/4-inch.
Yeah, that’s tight, but this bolt’s holding your whole weekend getaway.
Recheck after a test drive.
Secure the hitch head to your vehicle’s receiver with the pin and clip, and boom—you’re ballin’ (literally).
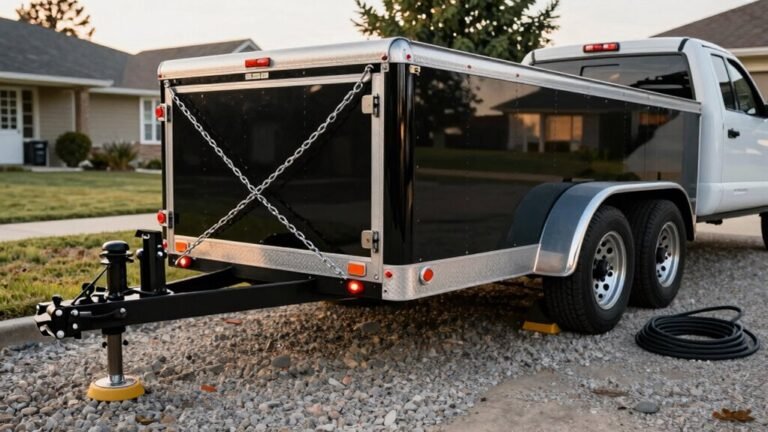
Connect the Trailer to the Tow Vehicle
Line up your rig like you’re parking a spaceship—precision counts, but don’t sweat it, you’ve got this.
Once you’re close, take these key steps to connect your trailer smoothly:
- Back up slowly until the hitch ball sits right under the coupler, then lower the coupler onto the ball without lifting the jack all the way.
- Snap the coupler shut, lock the latch, and slide in the pin to keep it secure—no wiggling allowed!
- Crisscross the safety chains under the tongue so they catch if the hitch fails (think of it as a seatbelt for your trailer).
- Plug in the breakaway cable and electrical connector, then test the lights—blinking brake lights = happy trails.
Keep the tongue raised during setup so you can move freely.
When everything’s hooked, it’ll feel like your rig just clicked into place—literally.
Secure the Spring Bars to the Trailer Frame
Slip those spring bars into place like you’re loading a high-stakes puzzle—you’ve got the power to make everything ride smooth.
Start by greasing the attachment points so things slide easy and last longer.
Flip the round bars up into the hitch head and twist them home, or slide the trunnion bars in by setting the bottom knob first, then the top.
Give ‘em a click with the pull pin and clip—you’ll know it’s right when it locks with confidence.
Keep them parallel to the trailer frame, like they’re standing at attention.
These bars are your backbone for balance, so treat ‘em right.
Line up the snap-up brackets so the chains hang true—straight up and down, not cockeyed.
Hook ‘em to the A-frame, center stage, where they belong.
You’re not just connecting metal—you’re building trust between truck and trailer, one snug link at a time.
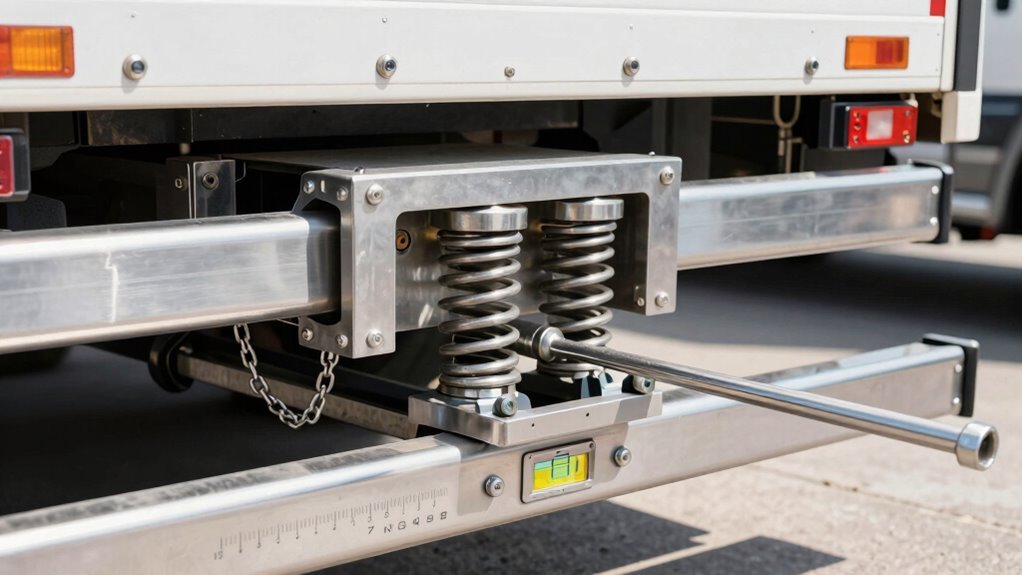
Adjust the Chain Tension for Proper Weight Distribution
Now that you’ve got those spring bars snapped into place and your chains ready to roll, it’s time to fine-tune the balance like a pro tuning a guitar—except instead of perfect pitch, you’re chasing perfect hitch harmony.
Get it right, and your ride will glide smoothly down the highway like a happy camper on cruise control.
Here’s how:
- Lift your tow vehicle about 3 inches to build tension and snap the chains onto the brackets evenly.
- Adjust chain links: fewer links = more tension, more lift; aim for at least five links for safety and balance.
- Re-measure bumper heights—you want them within ½ inch of your original numbers.
- Tweak hitch head tilt with washers if needed, adding for more front-end lift or removing to ease up.
A little tweak now saves a wobbly ride later—now *that’s* hitch magic!
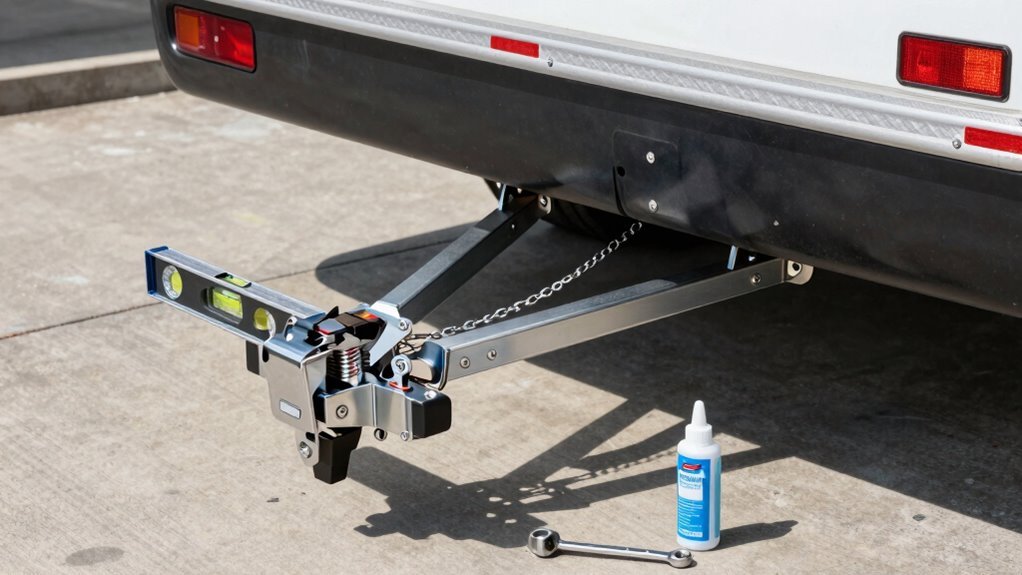
Check Trailer and Tow Vehicle Alignment
Why does your trailer look like it’s doing a slow-motion lean toward the horizon?
Probably because you skipped checking alignment on level ground.
Start there—your trailer frame needs to sit perfectly parallel to the ground so measurements are accurate.
Measure from the ground to the trailer ball’s base; it should be 1–3 inches higher than the coupler.
Tall trucks? Use a drop shank.
Lower rigs? Go with a rise.
Aim to have the trailer’s front 1 inch lower than the back—this slight forward tilt helps transfer weight and fights sway.
When the hitch and coupler sit flush, they create friction that resists wobbling from wind or passing trucks.
Double-check tongue weight too—460 pounds is solid, leaving room for passengers and gear.
Get it aligned, and your rig won’t just look right—it’ll *feel* right.
Frequently Asked Questions
Can I Use a Weight Distribution Hitch on a Rental Trailer?
You probably can’t slap a weight distribution hitch on a rental trailer without getting the rental company’s okay first—sorry!
It’s their gear, and they don’t like surprises. Tinkering without permission could break the rules, damage the trailer, or leave you with a scary bill. Skip the DIY drama: just call them, ask the right questions, and stay safe while towing happily ever after!
Are Weight Distribution Hitches Compatible With All Trailer Types?
Nope, weight distribution hitches aren’t one-size-fits-all—they’re more like tailored suits for trailers.
You’ve got to match ’em right, or things get wobbly fast.
They play well with bumper-pulls, RVs, and boat trailers, but go buddy-buddy only if ratings align.
Think hitch class, weight limits, and trailer type—mix those up, and you’re asking for a wiggly, waggy ride.
Match smart, tow happy!
How Often Should I Inspect My Weight Distribution Hitch Components?
You should inspect your weight distribution hitch at least once a year, but honestly, don’t wait that long—check it before every trip!
If you’re towing daily or in tough conditions, peek under there weekly or even daily.
Look for cracks, rust, or wonky bolts.
Think of it like checking your car’s oil—skipping it might save time now, but later?
Oh boy.
Keep it tight, lubed, and safe, and your hitch’ll thank you with smooth, wobble-free rides!
Do Weight Distribution Hitches Reduce Trailer Sway Completely?
No, weight distribution hitches don’t stop sway completely—sorry, they’re not magic!
Did you know nearly 30% of trailer sways happen even with a hitch?
They seriously reduce wobbling by balancing weight and using spring bars, but you still need proper loading, tire pressure, and smart driving.
Think of it like cruise control: helpful, but you’ve gotta steer too.
Sway control adds safety, not superpowers!
Can I Install a Weight Distribution Hitch by Myself?
You can totally install a weight distribution hitch solo—no sweat!
Just grab your wrenches, a torque wrench, and maybe a jack for the heavy bits.
It’s like adult LEGO: lift, bolt, and click everything together.
Yep, it’s heavy, but with 30–60 minutes and steady hands, you’ll nail it.
Just follow the manual, keep things level, and don’t forget to torque those bolts—safety first, superhero!
Conclusion
You’ve got this—setting up your weight distribution hitch is like balancing a seesaw at the park: too much on one end and things get wobbly! Last summer, Dave nearly tipped his trailer until he adjusted the chains just right—*click, click*, smooth as ice. Now his rig rides level and steady. With everything snug, aligned, and tuned, you’re ready to roll. Happy trails, captain—your caravan’s dancing perfectly behind you!
References
- https://www.lippert.com/blog/dead-weight-hitch
- https://www.prolinetrailers.com/weight-distribution-trailer-hitch-101/
- https://www.etrailer.com/faq-2-steps-weight-distribution-size.aspx
- https://www.youtube.com/watch?v=tkPsIOyMWqQ
- https://www.youtube.com/watch?v=nAuiFIJHAQ0
- https://www.equalizerhitch.com/blog/what-is-a-weight-distribution-hitch-and-why-do-i-need-one/
- https://www.lippert.com/blog/weight-distribution-hitch-setup
- https://blog.propridehitch.com/installing-a-weight-distribution-hitch
- https://www.youtube.com/watch?v=xDDFtcITumw
- https://www.youtube.com/watch?v=PGAdTyFkYvY