How to Prepare Your RV for Long-Term Storage
To prepare your RV for long-term storage, start by emptying all tanks—freshwater, gray, and black—then thoroughly clean them to prevent odors. Follow up with a winterizing flush using RV antifreeze to protect the plumbing from freezing and damage.
Charge the battery fully before storage and disconnect it to prevent drain, and check tire pressure to ensure they’re properly inflated. Inspect the roof sealant for cracks and reseal any gaps to keep moisture out and maintain a dry interior.
Place moisture absorbers inside cabinets and storage compartments to prevent mold and mildew. Crack open a few vents slightly to encourage airflow and reduce condensation during long-term storage.
Cover your RV with a breathable, fitted cover that shields it from dust, UV rays, and pests. Store it in a secure, level location—ideally indoors or under cover—to protect it while idle.
Empty and Clean All Holding Tanks
Before you tuck your RV in for storage, let’s tackle the not-so-glamorous but super important job of emptying and cleaning those holding tanks—your future self will thank you when spring rolls around and everything smells exactly like a fresh meadow, not a forgotten gym sock.
Start by fully draining both gray and black tanks, then rinse them out—use lots of water and a good flush to clear any sneaky residue.
Clean the black tank with bacteria and enzyme treatments to break down waste, and sanitize with ¼ cup bleach per 15 gallons (soak 24 hours, then flush).
For a greener touch, vinegar spray works wonders.
After dumping, add a tank deodorant or Camco TST to keep things fresh.
Use single-ply toilet paper for your final flush—trust us, it helps.
Close both valves tight after draining to avoid leaks, and never leave them open.
Store tanks empty to dodge frozen nightmares preventing mold risk.
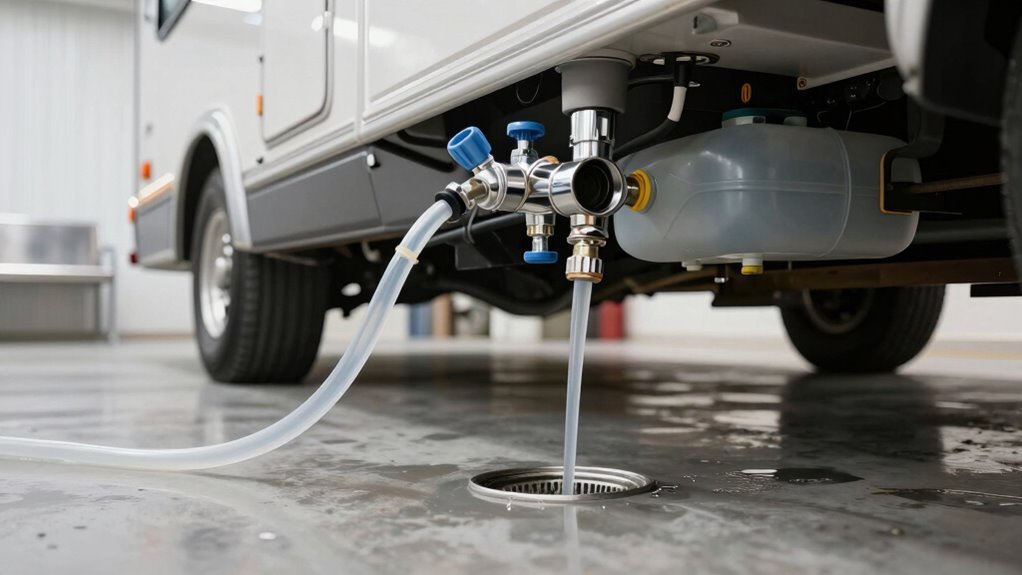
Winterize the Plumbing System
Now that your holding tanks are spotless and sitting empty, it’s time to turn your attention to the plumbing—because nothing says “winter surprise” like a burst pipe on the first cold morning.
Start by safely draining your water heater—let it cool first, open the relief valve, then empty completely.
Bypass the heater so antifreeze doesn’t fill it.
Next, choose your method: blow out lines with compressed air (40–50 PSI max), or use non-toxic pink RV antifreeze.
With the pump method, suck antifreeze through all faucets—inside, outside, even the toilet—until pink flows.
Don’t forget to pour a cup down each drain and into the toilet bowl to guard P-traps.
Remove water filters, drain appliances, and always follow your manual.
A little effort now saves a soggy, icy mess later.
The safest approach is to winterize plumbing and dry camp to avoid freezes and protect your system during long-term storage.
Your future self will thank you—no plumbing horror stories on spring’s first adventure!
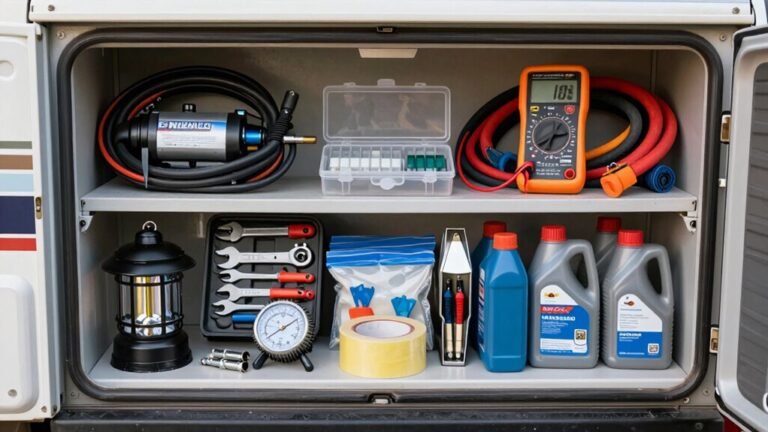
Protect the RV Battery
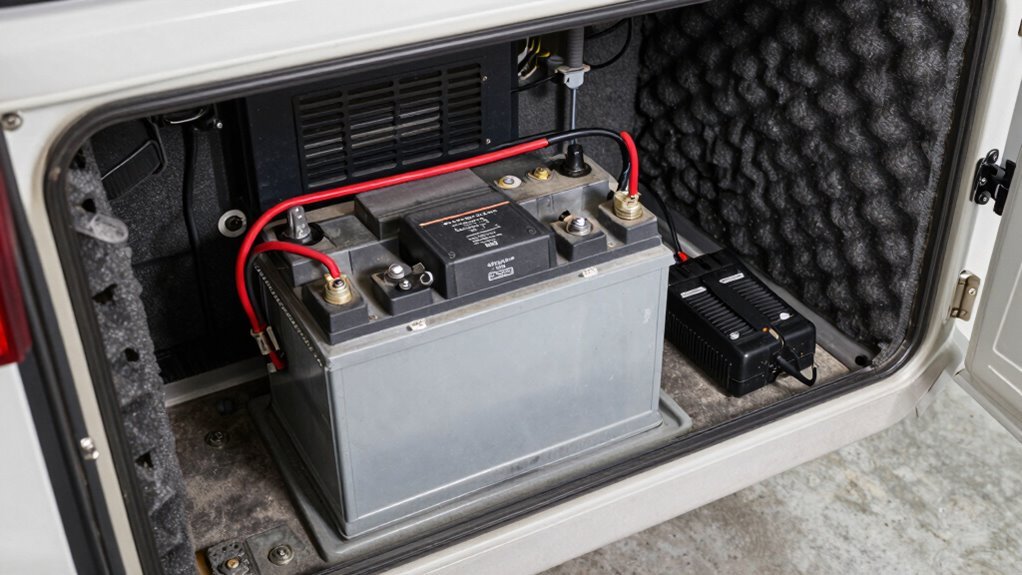
How’s your RV’s power source holding up? Don’t let your battery turn into a dud while your rig’s snoozing. To keep it happy and ready for adventure, follow these heart-to-heart tips:
- Keep it charged just right—overcharge a flooded battery and it’ll gasp for air, undercharge a lithium and it’ll feel unloved.
- Clean those terminals with baking soda magic, scrub like you’re detailing a tiny car, then coat them with petroleum jelly—yes, it’s like sunscreen for batteries.
- Store it cool and dry, like your favorite snacks, not in a sauna or freezer.
Use a smart charger, check fluid levels monthly, and never skip safety gear—gloves and goggles are your battery’s BFFs.
Trust me, your future self will high-five you when the power kicks on instantly next season.
Who knew batteries loved care packages too?
Flooded batteries require periodic distilled-water adds to replace lost electrolyte due to overcharging increases gas generation.
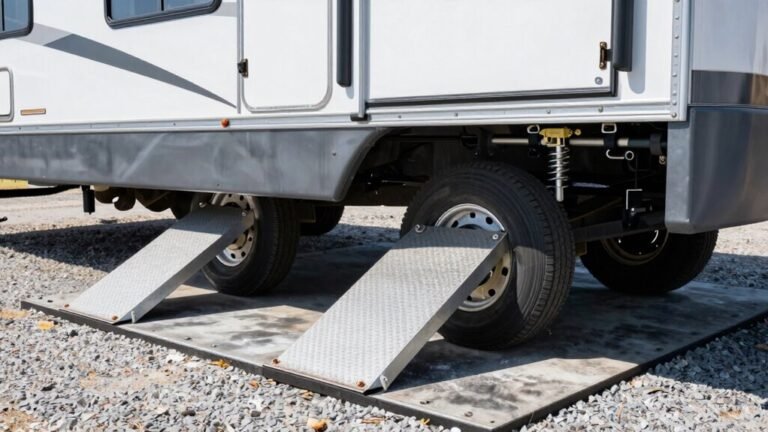
Inflate and Inspect Tires
Rolling out trouble-free when you’re ready to hit the road starts with giving your RV’s tires some serious love before tucking it in.
Pump them up to the manufacturer’s recommended pressure—don’t guess, check the sidewall or manual!
Remember, tires lose about 1–2 PSI for every 10-degree drop, so cold weather means more frequent checks.
Skip the overinflation, especially if you’ve got aluminum rims not built for high pressure.
Underinflated tires? That’s a fast track to heat buildup and blowouts.
Inspect for cracks, dry rot, or flat spots from sitting too long—nobody likes nasty surprises.
If you’re storing over three months, jack it up with proper stands to ease the strain.
Roll the RV every month or two if you don’t, just to keep tires happy.
Toss on tire covers too—sunlight and rain are basically kryptonite.
Your tires will thank you when adventure calls again!
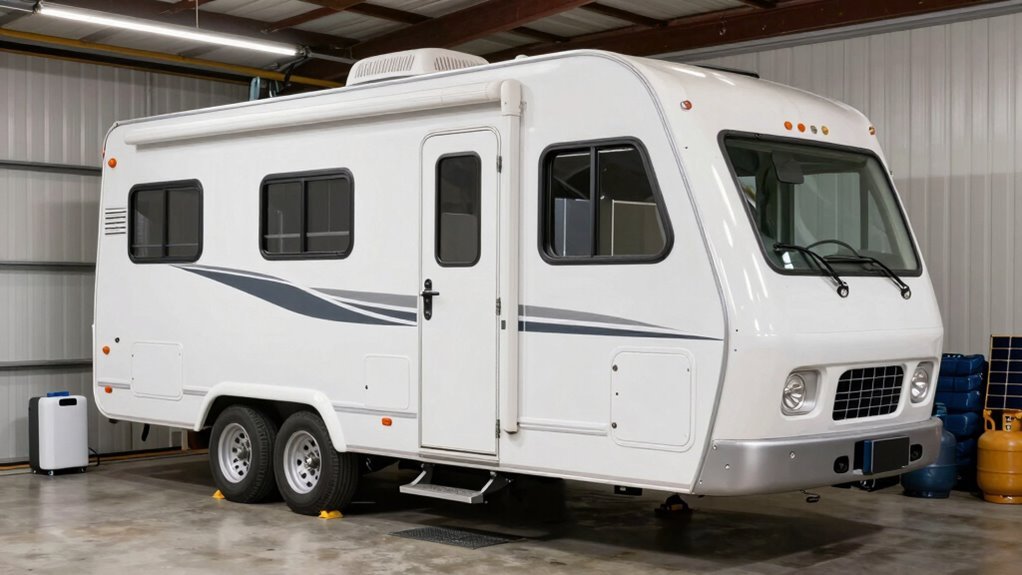
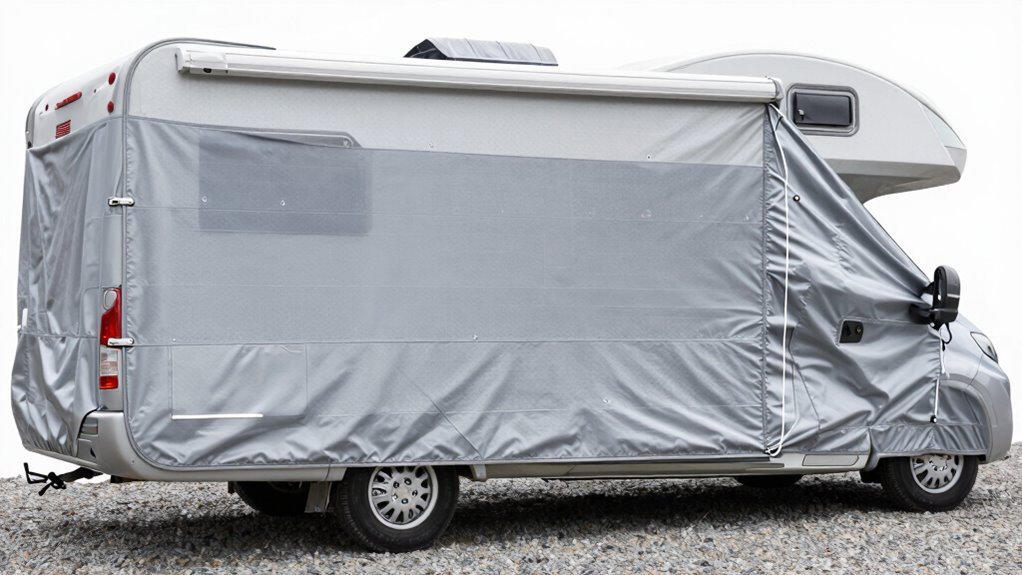
Cover the Exterior Properly
You’ve pumped up the tires and given them a once-over—great job, road warrior!
Now let’s shield your rig like a pro.
A good cover isn’t just a blanket—it’s your RV’s bodyguard against sun, rain, and grime.
Pick one that breathes, fits snug like a favorite hoodie, and laughs at UV rays.
Don’t forget to wash and wax first—trapped dirt under a cover is like sandpaper on paint!
Here’s what’ll keep your heart (and RV) happy:
- Peace of mind knowing mold isn’t partying in hidden corners.
- Pride when you reveal a shiny, unscathed finish months later.
- No nasty surprises from peeling trim or water stains throwing a tantrum.
Use soft pads on edges, vent the cover, and secure it gently—no yanking!
You’re not burrito-wrapping; you’re protecting a home on wheels.
Prevent Critter Intrusion
While your RV sits parked and quiet, furry freeloaders might be sizing it up for their next vacation home—no invitation needed.
Seal every crack, vent, or cable gap with expanding foam, caulk, or steel wool—mice can squeeze through dime-sized holes!
Stuff copper mesh into small spaces and use mesh screens where airflow matters.
Soak cotton balls in peppermint oil (not extract!) and tuck them in cabinets—it’s like saying “no vacancy” to rodents.
Add dryer sheets or sachets near kitchens for extra backup.
Remove all food, wipe surfaces, and vacuum crumbs so your rig smells less like a snack bar.
Shine LED or solar lights underneath, use ultrasonic gadgets, and set traps nearby.
Check monthly for droppings or chew marks, and reapply oils after rain.
Stay vigilant, and your RV stays critter-free—no eviction notice required!
Clean and Condition Interior Surfaces

Now that you’ve sent the snack-seeking squirrels and uninvited mice packing, it’s time to turn your attention inside—where spills, crumbs, and sticky fingerprints have been throwing their own little RV rave in your absence.
Show those messes who’s boss by giving every surface some love. A clean RV isn’t just satisfying—it’ll spark joy when you reopen it months from now.
Here’s how to make it feel fresh and cared for:
- Wipe down counters, cabinets, and appliances with RV-safe cleaners—no scorched stovetops or mystery goo allowed!
- Launder all fabrics and store them with dryer sheets—your future self will breathe easier (literally).
- Scrub the fridge and leave it propped open—say goodbye to funky smells before they start.
Don’t forget the floors, drawers, and under-sink hideouts. A little elbow grease now means pure adventure magic later!
Ventilate to Prevent Mold and Mildew
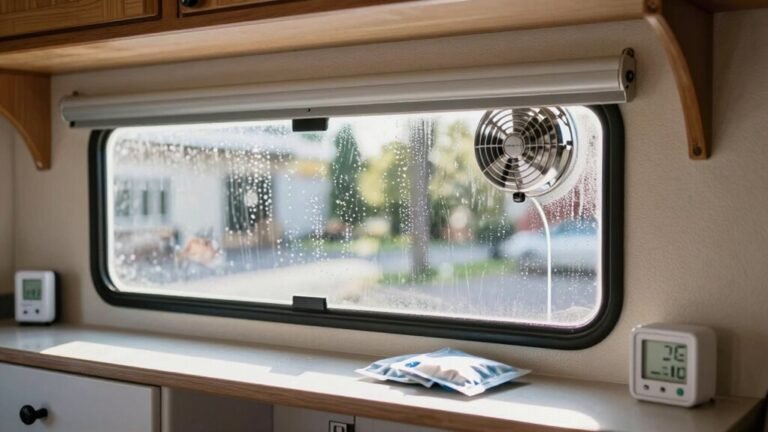
Letting fresh air flow through your RV is like giving it a big, deep breath of clean mountain air—except you’re the one calling the shots. Crack open roof vents slightly to let air swap out without inviting rain, and install a powered fan like a Furrion to kick damp air out on duty.
Keep vent covers ready to snap shut if storms roll in, and toss 360 Siphon vents on tank outlets to banish gross smells and moisture.
Propped-open cabinet and fridge doors help air reach sneaky damp corners, while tiny USB fans stir up stagnant spots under beds or in closets.
Set ceiling fans spinning now and then to fight condensation, and create airflow paths by cracking low and high vents—hello, stack effect!
Toss in moisture absorbers near sinks and pipes, but don’t let stored gear block the breeze.
You’re not just airing it out—you’re throwing a healthy, mold-free party your RV didn’t know it needed.
Store With the Roof Sealed and Dry
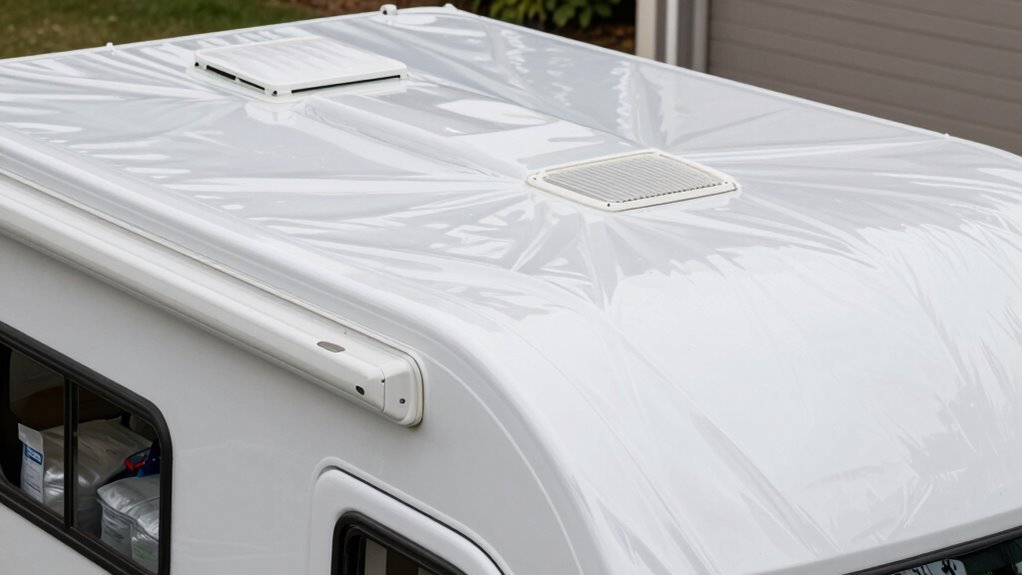
You’ve given your RV a burst of clean air, chasing out musty vibes and keeping mold on permanent timeout—great job! Now, seal that roof tight and keep it bone dry before storage. A strong, waterproof barrier isn’t just smart—it’s your RV’s winter armor. Don’t wait for leaks to cry for help. Instead, Imagine this:
- Peace of mind knowing freeze-thaw cycles can’t crack your roof open like a soda can.
- Pride in preserving your RV’s value, so it’s ready to roll like new when adventure calls.
- Joy of opening up next season to dry, fresh spaces—no musty surprises or panic fixes.
Clean every seam, pick the right sealant—like silicone or EternaBond—and let it cure fully.
No shortcuts!
A sealed, dry roof means your RV rests safe, sound, and ready.
Choose a Secure Storage Location
Where will your RV rest easy while you’re off living life? Choose a spot that’s safe, smart, and stress-free.
Look for places with strong fences, working cameras, and lights that stay on all night—your rig deserves a fortress, not a fort made of cardboard.
Go for keypad or computer-controlled gates; they’re like bouncers for your RV.
Covered and indoor storage beats the sun and snow, and hey, some even offer climate control—fancy!
Indoor spots lock up tight, while outdoor ones still need good fencing and 24/7 monitoring.
Check access hours too—some let you swing by anytime, others stick to 6 a.m. to 10 p.m.
And bonus points if they throw in snow removal or battery charging.
It’s like VIP service for your home on wheels.
Compare prices, but remember: a little extra now saves big headaches later.
Your RV’s not just parked—it’s on vacation, too!
Frequently Asked Questions
Should I Leave the Refrigerator Open or Closed During Storage?
You should leave your RV fridge open during storage—seriously, don’t be that person who traps in musty secrets!
It lets air flow, stops mold from throwing a party, and prevents funky smells.
Just prop it slightly open with a towel or use the built-in catch.
Closed doors trap moisture like a swamp, and nobody wants a mildew surprise.
Keep it dry, keep it fresh, and your fridge will thank you when adventure calls again!
Can I Store My RV on Grass or Dirt?
You can store your RV on grass or dirt, but you’ll want to take steps—like Sarah in Montana learned after her trailer sank slightly and tilted, making the fridge door swing open on its own.
Use pavers or gravel pads to level it, keep tires off damp ground with blocks, and add wax to the exterior.
It’s no party for your undercarriage if it’s sitting in gunk, so elevate and protect—it’ll thank you later!
Do I Need to Disconnect the Propane Tank for Storage?
Yes, you absolutely need to disconnect your propane tank for storage—don’t skip this!
Close the valve tight so no gas sneaks out, then unhook it completely.
Think of it like unplugging a toaster: safe and smart.
Store it outside, upright, and away from sparks or heat.
Your tank’s happier breathing fresh air than chilling in a dark garage.
Safety first, fun next!
How Often Should I Start the Engine During Storage?
You should start your engine at least once a month during storage—every 10 to 14 days is even better if you’re feeling enthusiastic!
Fire it up for 15 to 20 minutes, let it hum like it’s daydreaming of the open road, shift through the gears, and keep everything lubed and lively.
It’s like a workout for your RV, minus the sweatbands.
Is It Safe to Store an RV With Solar Panels Attached?
Yeah, it’s totally safe to store your RV with solar panels attached—you won’t turn into a solar-powered runaway truck.
Just unplug them from the batteries and cover them if hail’s a worry.
Panels handle weather like champs, especially those flexible, magnetic ones.
They’ll happily soak up stray sunlight while your RV snoozes.
Think of them as tiny sun collectors throwing a charge into your battery now and then.
Smart, simple, and way cooler than a dead battery surprise.
Conclusion
You’ve cleaned, covered, and prepped like a pro—great job! Remember, “an ounce of prevention is worth a pound of cure,” so your future self will thank you when it’s time to hit the road again. Keep that roof dry, tires firm, and battery happy. With everything sealed and stored right, your RV’s just dreaming of open highways. Now go grab a snack, kick back, and dream big—adventure’s waiting!
References
- https://www.youtube.com/watch?v=0Xf91YGU78c
- https://www.keystonerv.com/owners/holding-tanks-usage-maintenance-and-tips
- https://capitalrvboat.com/checklist-for-winterizing-your-rv-before-storage
- https://www.tank-depot.com/blog/boondocking-bliss-water-and-waste-holding-storage-tips-for-off-grid-camping
- https://www.campanda.com/magazine/rv-tanks-guide/
- https://www.lazydays.com/rv-lifestyle/preparing-for-storage/
- https://www.extraspace.com/self-storage/faq/how-to-prepare-rv-for-winter-storage/
- https://www.winnebago.com/lifestyle/winnebagolife/education/how-to-winterize-your-rv-and-storage-considerations
- https://www.youtube.com/watch?v=eU-ZwszRzHQ
- https://blog.airxcel.com/tips-for-winterizing-rv-water-systems/