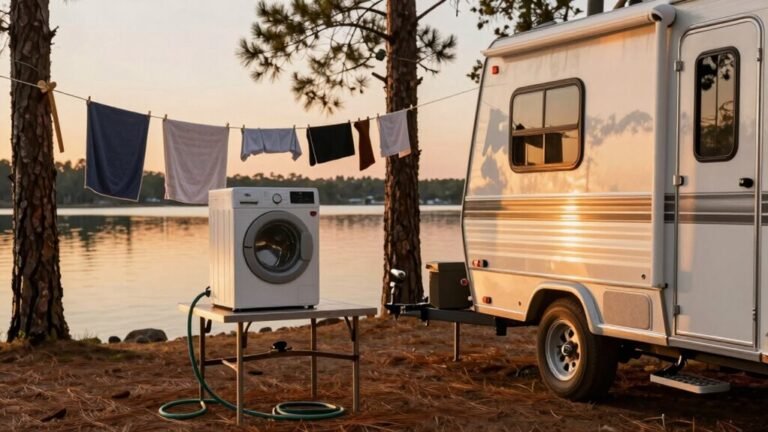
How to Hitch and Unhitch a Travel Trailer Safely
First, check your tow vehicle’s fluids, tires, and hitch to ensure everything is in working order. Park the tow vehicle on level ground, aligning it carefully with the travel trailer for a smooth connection.
Slowly line up the hitch, using wheel chocks to secure the trailer wheels. Lower the coupler securely onto the correct-sized ball hitch, then give it a firm yank to confirm it’s locked in place.
Cross the safety chains beneath the hitch and connect the trailer’s electrical cord to test the lights. Check that brakes, blinkers, and running lights all function properly—safety starts with a secure hitch.
When it’s time to unhitch, chock the trailer wheels and disconnect the electrical cables and safety chains. Lift the trailer jack, then slowly pull the tow vehicle forward to release the coupler.
Once separated, level the travel trailer and set up the stabilizing jacks. A well-hitched travel trailer ensures a safer journey and smoother adventure.
Inspect Your Tow Vehicle and Trailer

Before you hit the road with your travel trailer in tow, take a few minutes to give both your vehicle and trailer a once-over—think of it as a pre-adventure checkup to catch any small issues before they turn into big headaches.
Check your engine oil, coolant, and all fluids—low levels can spell trouble when you’re hauling extra weight.
Make sure the battery’s charged and terminals are clean, and give belts and hoses a quick once-over for cracks or wear.
Don’t forget fuel—you’ll want plenty for the trip plus a buffer.
Tire pressure should be spot-on, tread good, and lug nuts tight.
Inspect the hitch, coupler, and safety chains closely—everything must match, fit, and lock securely.
Test all lights, brakes, and electrical connections so you’re seen and safe.
Ensure the ball size matches coupler to prevent accidental detachment during transit.
It’s not glamorous, but hey, neither is breaking down because you skipped the basics!
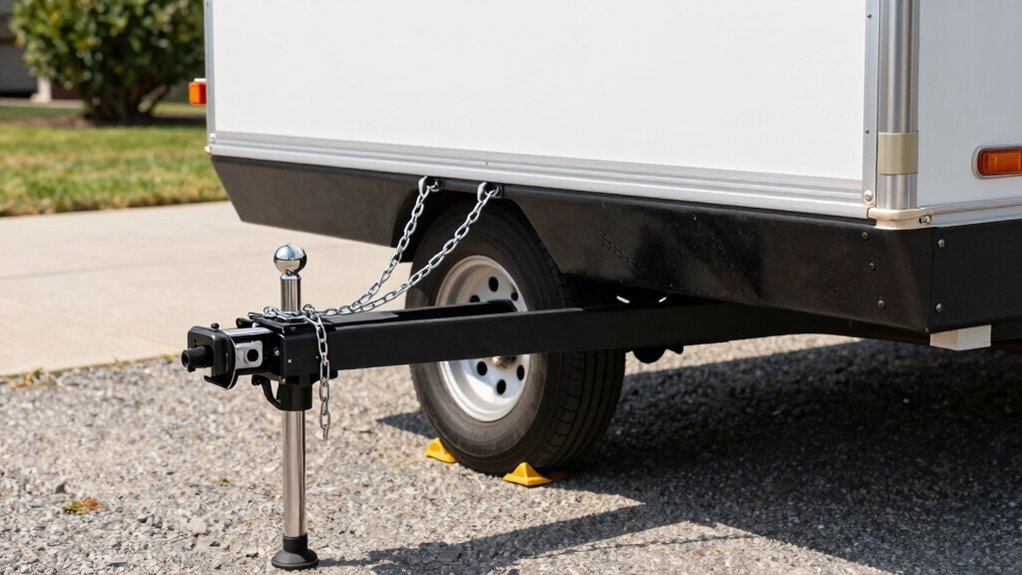
Position Your Vehicle Correctly
How do you nail that perfect hitch on your first try?
Start by picking a flat, level spot—no slopes steeper than 1%—so everything lines up smoothly and your trailer won’t sneak away.
Pop wheel chocks behind the tires (both sides if it’s heavy); better safe than sorry, right?
Now, crank up those stabilizing jacks all the way—clear at least six inches from the ground—so you don’t clunk into them while backing up.
Slowly reverse your tow vehicle, keeping about a bumper’s length (6–12 inches) from the trailer tongue.
Use your backup camera or a trusty spotter (preferably not your easily-distracted dog) to center the hitch ball under the coupler.
A well-aligned shot means less fumbling and fewer “oops” moments.
Once the trailer coupler is properly aligned, ensure the trailer coupler can pivot freely to accommodate movement during towing.
Connect the Trailer Hitch and Lock the Coupler
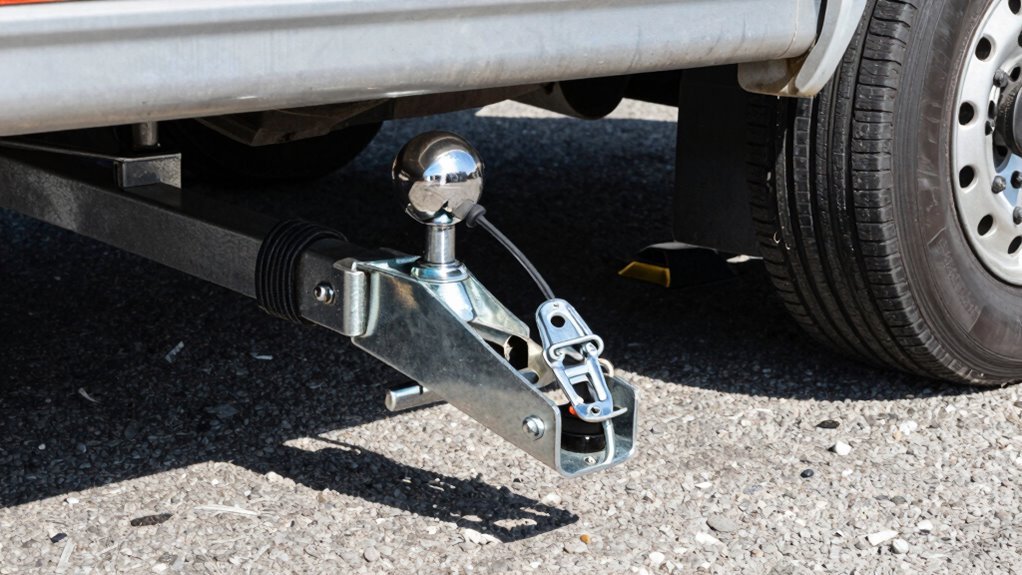
Drop that coupler down smooth and snug over the hitch ball—like a ring slipping onto a finger at the altar, but way less nerve-wracking.
Make sure it’s the right size: your coupler should match the ball exactly—1-7/8″, 2“, or 2-5/16″—and the ball’s rated for your trailer’s weight.
Give everything a quick once-over: no cracks, gunk, or rusty spots.
Clean, greased ball? Check.
Now, lower the coupler until it seats fully and the skirt sits flush.
Slam that latch shut—over-center, cam lock, whatever you’ve got—and pin it tight so it won’t budge.
Do the pull test: jack the tongue up slightly and make sure the coupler stays locked.
Toss on a coupler lock like it’s a seatbelt—safety first!
If there’s a secondary pin or clip, use it.
Double-check the latch is fully closed, no gaps, no wiggle.
You’re not just hitching—you’re sealing the deal.
Ensure the exact ball and coupler match to prevent accidental detachment during travel.
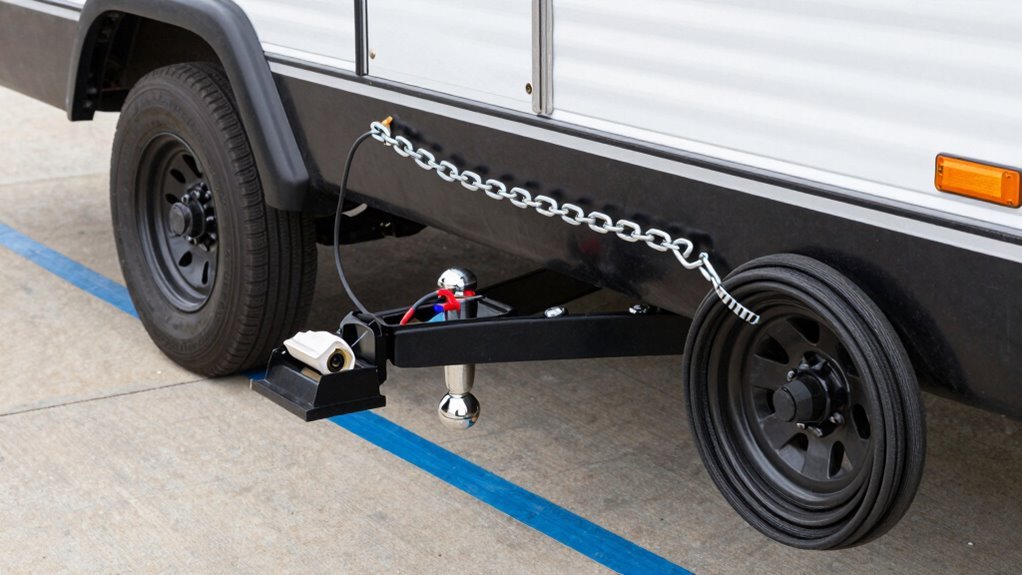
Attach Safety Chains Properly
Now that your trailer’s hitch is locked down tight and ready to roll, it’s time to get those safety chains in place—because let’s be real, nobody wants a runaway trailer playing tag with traffic.
Hook one chain to each side of the trailer tongue using sturdy bolt tabs, never by welding—those hot spots weaken metal.
Cross them in an X under the tongue so they catch the coupler if it drops.
Attach the left chain to the right hitch point on your vehicle, and vice versa, keeping slack even but not dragging.
Make sure they hang 3 to 5 inches above the ground and won’t scrape pavement.
Use heavy-duty hooks stronger than the chains themselves, connected to solid frame points near the bumper.
Double-check that both chains are rated for your trailer’s GVWR—safety isn’t the place to cut corners.
Done right, you’ve just added a serious safety net, minus the circus.
Test Trailer Lights and Electrical Connections
Grab your flashlight and let’s make sure your trailer’s speaking the same light language as your tow vehicle—because a blinker that blinks too slow, or worse, not at all, could turn your smooth getaway into a roadside drama nobody signed up for.
First, eyeball the plug and socket—no bent pins, gunk, or frayed wires.
Plug ‘em in, then test each light: brakes, turn signals, hazards, and tail lights—yes, even the dim ones at the front.
See a flicker? That’s your trailer crying for help—probably a bad ground.
Use a multimeter if you’ve got one, or a simple tester to confirm power where it should be.
Don’t forget reverse lights and the breakaway switch connection.
And hey, if your blinker dances faster than a disco bee, you’ve got a short.
Fix it now, not on the highway—because safety’s no joke, but your ride can be.
Unhitch Safely With Wheel Chocks and Stabilizers
Getting ready to unhitch? Awesome—let’s do this safely!
First, park on a level spot and slap those wheel chocks snugly on both sides of the trailer tires—front and back—to stop any sneaky rolling.
If the ground’s soft or soggy, toss down some blocking under the jack for extra support.
Make sure your hand brake’s on, then disconnect the brake cable, light cord, and emergency breakaway lanyard.
Keep safety chains hooked for now—they’re your backup bff.
Next, crank the jack high enough to relieve tension on the sway bars, then unhook them carefully (nobody likes whipping chains!).
Lower the trailer slightly so weight settles on the tow vehicle before lifting the hitch latch.
Once the ball’s free, raise the jack, and slowly drive the truck forward.
Boom—you’re unhitched like a pro!
Level the Trailer and Set Up Camp
You’ve nailed the unhitch—give yourself a quick high five!
Now, let’s level that rig and make camp.
First, pick the most level spot in the site and park two feet out—back in or pull through, avoiding bumps.
Position the trailer so the bubble in your level centers side-to-side.
Put a level across the hitch or on the floor to check.
See the low side? Add leveling blocks—stack ’em like a pyramid for stability.
Drive the tire onto them until the bubble’s happy.
Then, crank the tongue jack—don’t forget wood underneath!—to level front to back.
Adjust landing legs if needed.
Once it’s balanced, deploy stabilizers at all four corners.
Pop jack pads under them so they don’t sink.
They don’t carry weight—just stop wiggles!
Add portable stabilizers if yours aren’t frame-mounted.
Boom—you’re officially camping like a pro!
Frequently Asked Questions
Can I Use My Car’s Backup Camera While Towing?
Yep, you can totally use your car’s backup camera while towing—*if* it’s designed for it.
Most factory systems get blocked by the trailer, but you can upgrade!
Swap in a trailer-ready setup like GMC’s Transparent Trailer View or add a wireless trailer camera.
These give you a clear shot of what’s behind, so you’re not guesswork-driving.
It’s like giving your rig superhero vision—minus the cape.
How Often Should I Service My Trailer’s Axle?
Back in the horse-and-buggy days, folks worried less about axle care than you should!
You’re gonna want to service your trailer’s axle every 12 months or 12,000 miles—whichever comes first—like Dexter recommends.
Smaller trailers?
Hit it every 2,000 miles.
You’ll check brakes, repack bearings, and keep things smooth.
It’s not glamorous, but hey, no one said being a road warrior was all glitter and no grease!
Are Surge Brakes Legal in All States?
No, surge brakes aren’t legal in all states—some say yes, others want electric instead.
You’ve gotta check local rules, ’cause they vary wild!
States like Oregon and Pennsylvania welcome surge, but others put restrictions based on weight.
If your trailer’s under 10,500 lbs, you’re likely fine, but always confirm.
Breakaway switches? Yep, most places demand ’em.
Do your homework, avoid surprises, and tow with total confidence and a smile!
What Size Hitch Ball Do I Need?
You need a hitch ball that matches your trailer’s coupler—no guessing!
Most travel trailers use a 2″ or 2-5/16″ ball, so check the plate on your coupler.
It’ll tell you the exact size and weight limit.
Pick a ball with a higher rating than your trailer’s weight, because safety’s sexy.
And hey, if it wobbles, you’re doing it wrong—snug fit only!
Do I Need a Brake Controller for a Small Trailer?
Yes, you do need a brake controller for a small trailer—if it’s over 1,000 pounds, your insurance probably demands it, and honestly, your driveway peace of mind does too.
Think of it as the co-pilot for your cargo, syncing stops so smooth they feel like a lullaby.
No jerky halts, no drama—just steady, safe rides, especially when hills sneak up on you.
Conclusion
Park with precision, pull with pride, and proceed with peace of mind. Proper prep prevents poor performance, pal! With hitch hooked, chains crossed correctly, and lights looking lovely, your trailer’s trail-ready. Unhitch with care, chocks in place, and camp vibes kick in—cha-ching! Travel trailer triumph is totally attainable, one safe step at a time. So, smile, shift into adventure, and savor every snapshot-stop along the sunny road.
References
- https://response.epa.gov/_healthsafetymanual/forms/TransportationSafety/Trailer_Towing_Pretrip_Safety_Checklist.pdf
- https://www.nctrailers.com/blog/2024-pre-trip-towing-inspection-checklist/
- https://myrvworks.com/wp-content/uploads/2019/04/RV-Inspection-Checklist.pdf
- https://blog.propridehitch.com/the-safe-towing-checklist
- https://www.bulletproofhitches.com/blogs/news/towing-checklist-4-things-to-check-before-you-tow
- https://roadside.goodsam.com/resources/pre-trip-inspection-checklist-for-rv-owners
- https://www.amfam.com/resources/articles/hobby-and-recreational-vehicles/ultimate-rv-road-trip-safety-checklist
- https://www.fantasyrvtours.com/Portals/3/Documents/Pre-Trip-RV-Inspection-Checklist.pdf
- https://blog.campingworld.com/learn-to-rv/how-to-hook-up-a-travel-trailer/
- https://www.migrvmarine.com/blog/how-to-hitch-and-unhitch-your-travel-trailer/