How to Fix a Leaky RV Faucet
Turn off the water and pop off the faucet handle to get started—you’ve got this! Checking the washer and O-rings is key when fixing a leaky RV faucet.
If the washer or O-rings are squished, worn, or cracked, replace them with matching parts for your RV model. Use Teflon tape on the threaded connections to ensure a watertight seal.
Reassemble the faucet snugly, but don’t over-tighten—it can damage the components. Turn the water back on and check for drips.
No leaks? High five! Still leaking? There’s a sneaky fix you might not know about yet…
Identify the Type of RV Faucet

Ever wonder why your RV faucet wiggles like it’s dancing every time you turn on the water?
That jiggle could mean you’ve got the wrong faucet type or it’s not mounted right.
Start by checking how many holes your sink has—single-hole faucets fit one opening, while double or centerset ones need more space for handles and sprayers.
If yours has a sprayer beside it, you’re likely looking at a double-hole setup.
Kitchen faucets usually have gooseneck or pull-down spouts for extra reach, while bathroom ones stay low and sleek.
Peek under the sink, too—widespread models spread out, and deck plates can hide extra holes.
Match the base to your sink’s layout, and don’t forget durable finishes like brushed nickel.
Get this right, you’re one step closer to a leak-free ride—no more faucet jitterbug!
Almost any faucet can be used with camper sink setups, as long as it fits the hole configuration and mounting style—retrofit feasibility makes replacement flexible and convenient.
Turn Off the Water Supply
Grab your toolbox and shut off that water—your leaky faucet won’t fix itself! First, turn off the water pump inside your RV to stop flow to the whole system.
Then, disconnect the external water hose—don’t skip this, or you’ll get a surprise shower! If your RV has an outside main water valve, shut that too.
No individual shutoff? That’s common; most RVs don’t come with them, so you’ll cut water to the whole rig.
Once off, open both hot and cold faucets to release pressure and drain leftover water.
Keep running them until nothing drips—seriously, wait it out.
Check low point drains too, just to be safe.
A dry sink means you’re good to go.
Trust me, skipping this step turns repairs into a soggy mess.
This ensures no active water source remains, which is essential before proceeding to next step when safe.
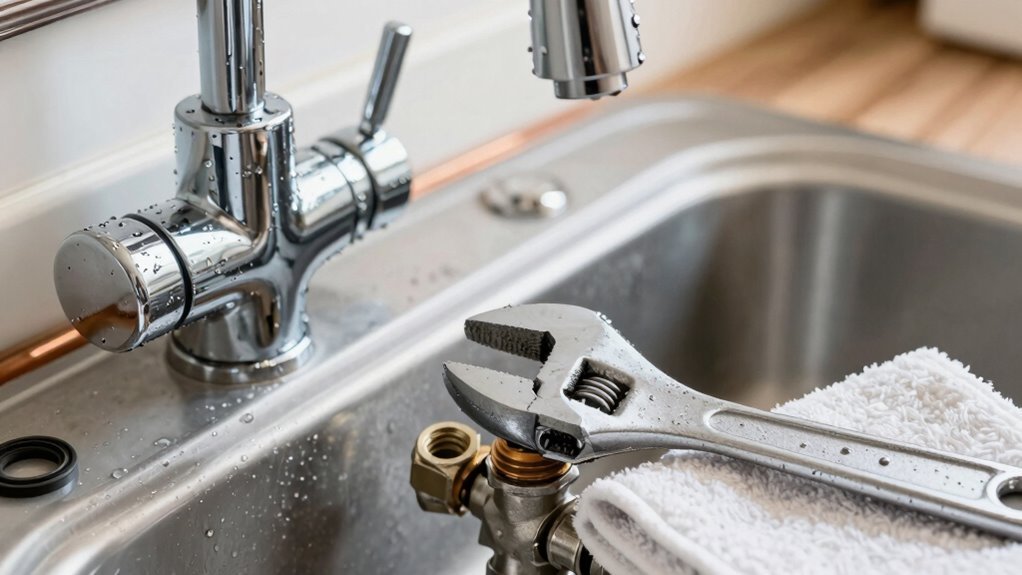
Gather the Necessary Tools and Materials
Get your gear ready—this is where the fun begins!
Grab an adjustable wrench, channel-lock pliers, and a basin wrench to tackle tight spots under the sink like a pro.
Don’t forget a screwdriver set and needle-nose pliers for those tiny clips and screws that love to hide.
You’ll need a faucet repair kit with O-rings, cartridges, and springs that match your RV model—drips hate these.
Pick up some Teflon tape, plumber’s putty, and spare washers while you’re at it.
Toss in a small parts tray so screws don’t pull a disappearing act.
Safety first: wear gloves and goggles.
Bring a flashlight, too—RV cabinets are basically caves.
And hey, a bucket catches surprises better than your socks.
Trust me, being ready beats crawling out from under the sink mid-job yelling, “Where’s the duct tape?!”
Converting between faucet types may be necessary, so ensure your setup supports either single-hole or three-hole configurations depending on your RV’s sink design single-hole and three-hole.
Remove the Faucet Handle
Now that you’ve got all your tools laid out and your workspace prepped, it’s time to get hands-on with the faucet itself—starting with the handle.
Don’t worry, it’s not as tough as it looks—most handles pop off with just a little know-how and the right move.
- Look for a tiny screw on the back or under a decorative cap—many RV handles hide their secrets!
- Use a flathead screwdriver or hex key, depending on your model, and don’t force it—easy does it.
- If it’s stuck, a gentle wiggle (not a Hulk smash) usually loosens it from the cartridge.
- Take your time with plastic or chrome pieces—they’re tougher than they seem, but can crack if rushed.
You’re doing great—just remember, every RV faucet’s a little different, kind of like snowflakes, if snowflakes dripped water.
Take Apart the Faucet Assembly
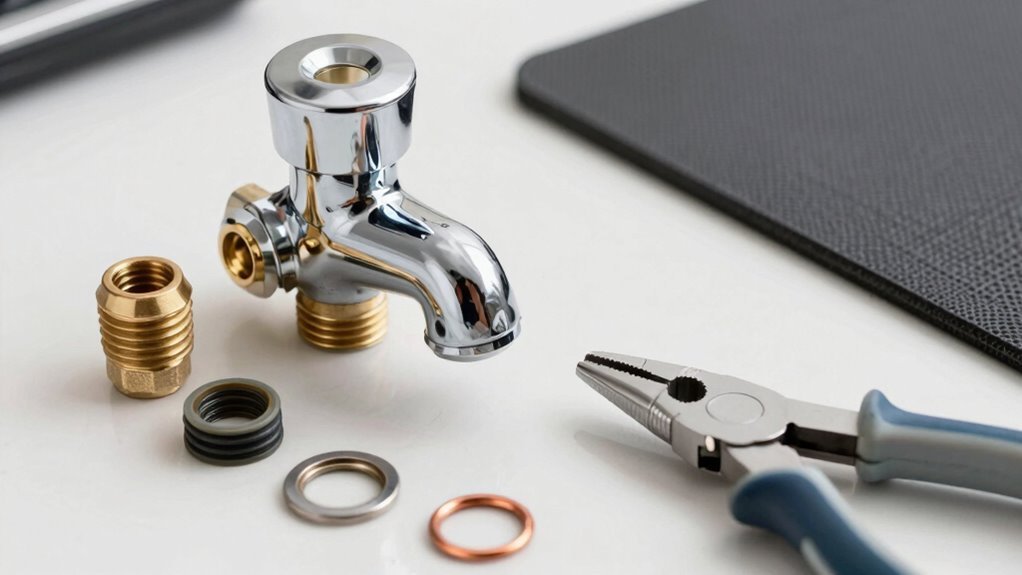
Time to dig into the guts of that drippy faucet and show it who’s boss!
First, grab your tools and loosen the mounting nut under the sink with a pipe wrench or channel-lock pliers—use a basin wrench if space is tight.
Once the nut’s off, lift the faucet out from above.
Next, disconnect the water supply lines by hand or with pliers, and pull the quick-connect pins—red for hot, blue for cold.
Don’t forget to yank out the sprayer hose: unhook it from below, remove the weight in two pieces, and slide the hose out through the top.
Toss a bucket under there and lay down shop towels—because surprise drips are *not* part of the plan.
With everything loose, fully remove the assembly and wipe the area clean.
You’re not just tearing stuff apart—you’re on a mission to stop that pesky leak!
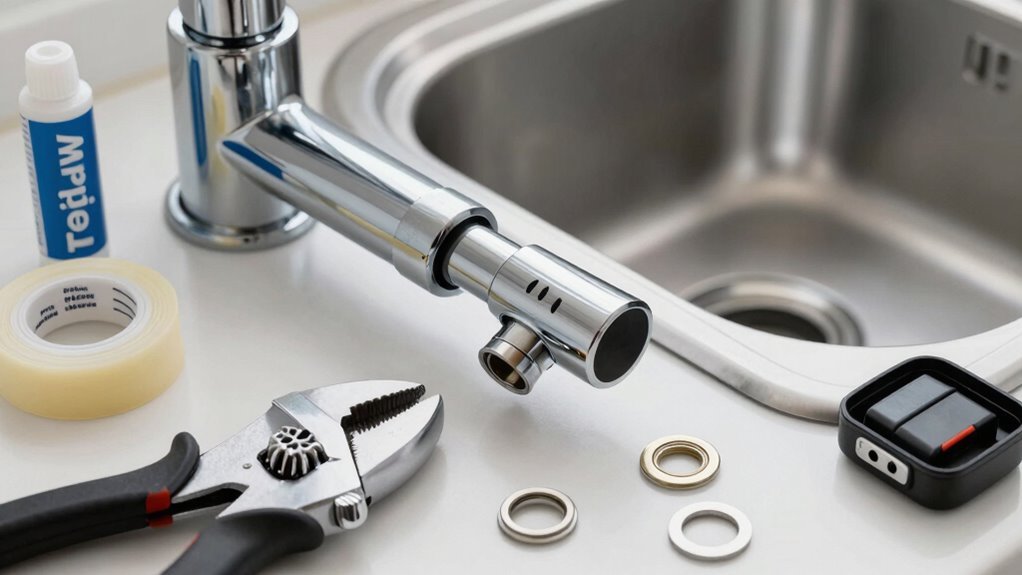
Inspect and Replace the Washer
Peering into the heart of your faucet like a plumbing detective, you’re about to track down the sneaky culprit behind that constant drip. The usual suspect? A worn-out washer.
Check for cracks, mushy edges, or flattening—these little rubber guys don’t stand a chance against RV life. While you’re in there, peek at the seating area; gunk or corrosion could be helping the leak thrive.
- Inspect both hot and cold sides separately to pinpoint the leak source
- Match the replacement washer exactly in size and thickness
- Choose durable neoprene—it handles water pressure like a champ
- Clean the seat thoroughly so your new washer seals tight
Pop in a fresh washer, reassemble with care, and hey—congrats! You just gave that drip the boot. Your ears (and water bill) will thank you.
Check and Replace the Cartridge if Needed
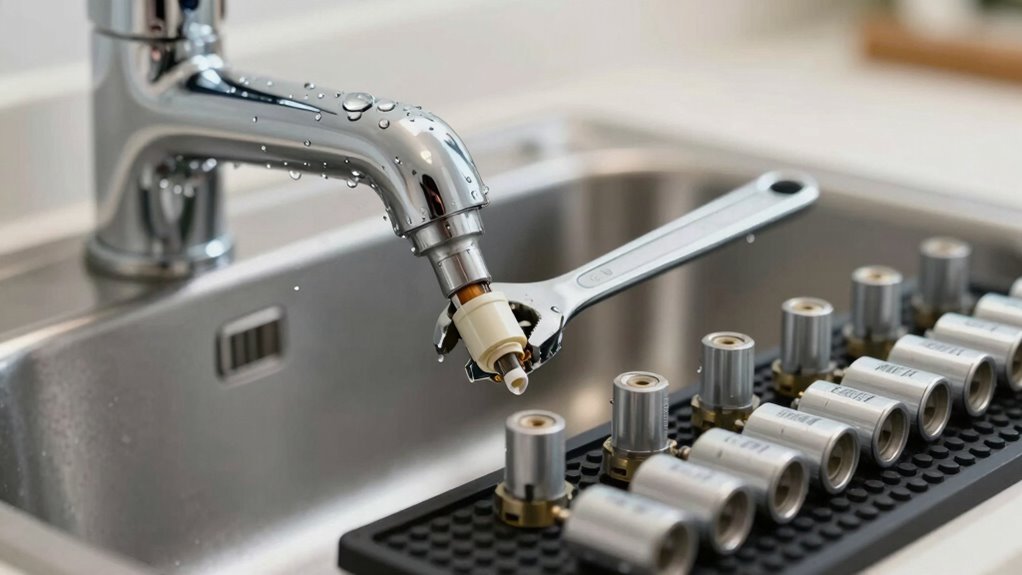
If that pesky drip still won’t quit after checking the washer, it’s probably time to investigate the cartridge—the hidden hero (or culprit) inside your faucet.
First, figure out what type you’ve got: single-handle, ball, ceramic disc, or multi-piece—peek inside and watch how it moves.
Don’t guess—check the maker and model, then hunt down the right replacement.
Measure it once you pull it out; RVs love weird sizes, and you don’t want a part that won’t fit.
Shut off the water, grab a bucket, and have your tools ready—cartridge puller, wrench, the works.
Remove the handle, unscrew the retainer, and pull the cartridge straight out like it’s a stubborn weed.
If it’s cracked, crusty, or just tired-looking, toss it.
Peek into the faucet body, too—give it a quick clean if it’s grimy.
Your RV deserves a fresh start!
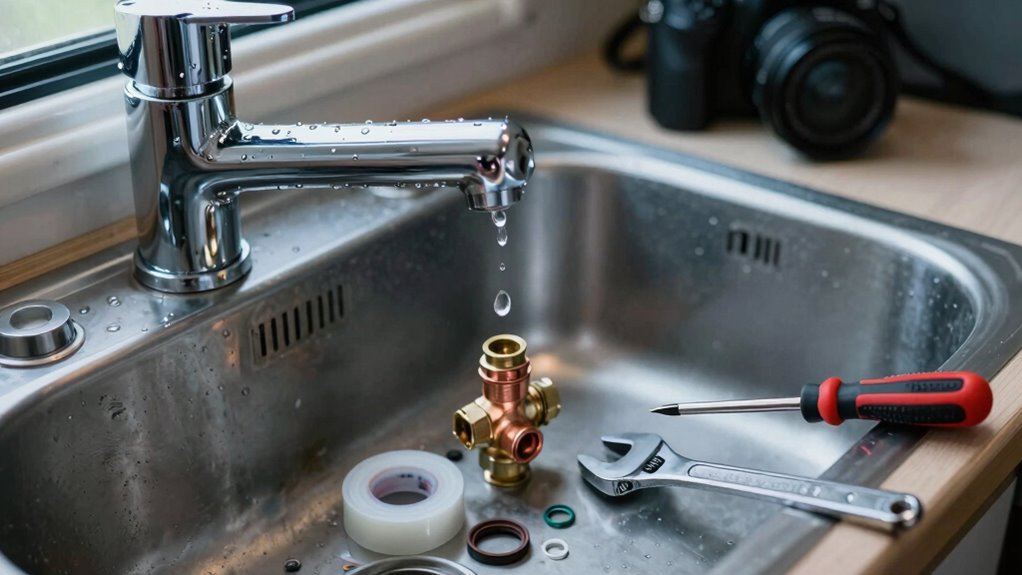
Replace Worn O-Rings
Grab your tools and get ready to squash that drip—for real this time—by tackling the sneaky little O-rings hiding inside your RV faucet.
These tiny rubber rings love to wear out and cause big headaches, but you’ve got this!
First, shut off the water and take apart the faucet to find the damaged O-rings—usually near the spout base or cartridge.
Look for cracks, flattening, or tears; if they’re sad and squished, it’s replacement time.
Match the size and material carefully—EPDM for heat, nitrile for general use—and don’t forget to lubricate the new ones with plumber’s grease.
- Use needle-nose pliers gently to remove old O-rings without scratching parts
- Clean the grooves thoroughly to help new O-rings seal tight
- Double-check that replacement O-rings fit snugly in their seats
- Replace worn snap rings or spout nuts to avoid future leaks
You’re not just fixing rubber—you’re saving your next road trip from dishpan hands!
Reassemble the Faucet and Test for Leaks
Now it’s time to bring your faucet back to life—piece by piece, just like a satisfying puzzle with running water as the prize.
Carefully feed the supply lines and sprayer hose through the sink hole, then snug the faucet into place.
Slide on the gasket, thread the mounting nut, and tighten gently—don’t crank it, or you’ll crack the plastic!
Reconnect the hot and cold lines with a wrap of Teflon tape, hand-tighten, then give them just a quarter-turn more.
Hook up the sprayer hose, make sure it glides smoothly, and secure any clips.
Slowly turn the water back on—no splashing surprises!
Check every joint, the base, and the sprayer for leaks.
Flip the handles, run the water, and celebrate those dry spots.
If it drips? Just snug the fitting a hair more.
No drips? You’re golden—your RV faucet’s back in action, and you just saved a plumber’s fee!
Frequently Asked Questions
How Often Should I Replace My RV Faucet?
You should replace your RV faucet every 5 to 10 years, but hey, if it’s still flowing strong and leak-free, no need to rush!
Keep an eye out for drips, rust, or wobbly handles—they’re telltale signs it’s time for a fresh one.
With regular cleaning and care, your faucet can outlast the norm.
Think of it like upgrading your coffee maker—why wait until it quits?
Can a Leaky Faucet Cause Water Damage Inside the RV?
Yes, a leaky faucet can absolutely cause water damage inside your RV, and you’re not just wasting water—you’re inviting trouble.
That tiny drip can sneak into cabinets, soak into floors, and hide behind walls, leading to warped wood, moldy smells, and even electrical issues.
Before you know it, your cozy home on wheels feels like a damp basement.
Don’t let a trickle turn into a full-blown disaster—fix it fast!
Is It Safe to Use the RV While Fixing the Faucet?
No, you shouldn’t use the RV while fixing the faucet—it’s like trying to change a tire mid-drive.
Turn off the water, open taps to kill pressure, and make sure everything’s dry and safe.
Skipping this step might flood your rig or worse.
Trust me, soggy socks and ceiling waterfalls aren’t part of the camping charm.
Play it smart, pause water use, and you’ll fix it faster with way less drama.
What Causes a Faucet to Leak Even After Repair?
Ever fixed a faucet only to see it drip again? Yeah, frustrating, right?
You probably missed a worn washer or cracked O-ring—if those little guys fail, leaks come back fast.
Maybe you didn’t snug the connections tight enough, or forgot plumber’s tape on the threads.
Could be mineral gunk clogging things or high pressure blowing past weak seals.
Or hey, maybe that old seat washer flipped?
Don’t sweat it—tiny fixes fix the fix!
Can I Upgrade to a Different Faucet Type Easily?
You can totally upgrade your faucet type with ease, and it’s a game-changer!
Just match the hole setup and plumbing size, and you’re golden.
Swap in a sleek gooseneck or sprayer style—no big overhaul needed.
Plus, metal RV-ready models snap in fast, cut leaks, and make your rig feel like a tiny gourmet kitchen.
Who knew upgrades could be this fun *and* functional?
Conclusion
You’ve done it! That pesky faucet won’t drip another drop, thanks to your handiwork. Fixing it wasn’t just easy, it was easier than teaching a goldfish to swim backward! With the right tools and a little patience, you saved time and cash. Now you’re all set for smooth, drip-free sinks on your next adventure—because every drop counts when you’re living large in your tiny rolling palace. Great job, DIY superstar!
References
- https://www.etrailer.com/dept-pg-RV_Faucets.aspx
- https://rvshare.com/blog/rv-faucet/
- https://recpro.com/rv-faucets/
- https://ambassadorfaucets.com/marine-rv
- https://www.rvfaucets.com/rv-products.html
- https://www.fontanashowers.com/RV-Single-Handle-Non-Metallic-Chrome-Travel-Faucet-p/fs9454.htm
- https://www.lippert.com/rv-camping/plumbing/faucets
- https://www.campingworld.com/inside-rv/kitchen-dining/kitchen-fixtures/kitchen-faucets
- https://www.keystonerv.com/owners/replace-a-kitchen-faucet
- https://www.youtube.com/watch?v=lX-Ll-iCW7I