How to Inspect Your RV for Leaks
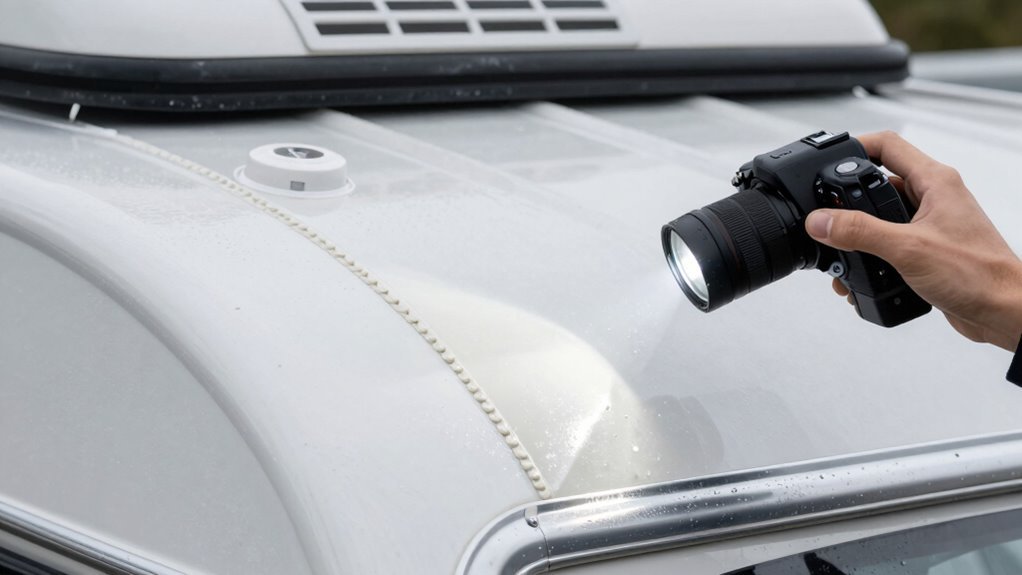
Start at the roof to inspect your RV for leaks—check seals around vents and skylights, and feel for tears in the membrane. Run a flashlight at a low angle to catch hidden cracks that might let water in.
Peek in windows for leaks, especially around the edges where sealing can degrade over time. Test slide-outs with a buddy to ensure they close tightly and don’t trap moisture.
Listen for drips during a hose test to pinpoint problem areas. Flush out plumbing and watch for sneaky leaks under sinks where connections may loosen.
If floors feel soft or you smell mustiness, inspect your RV for leaks immediately. These are common signs of water damage hiding beneath surfaces.
Check the Roof for Damaged Seals and Cracks
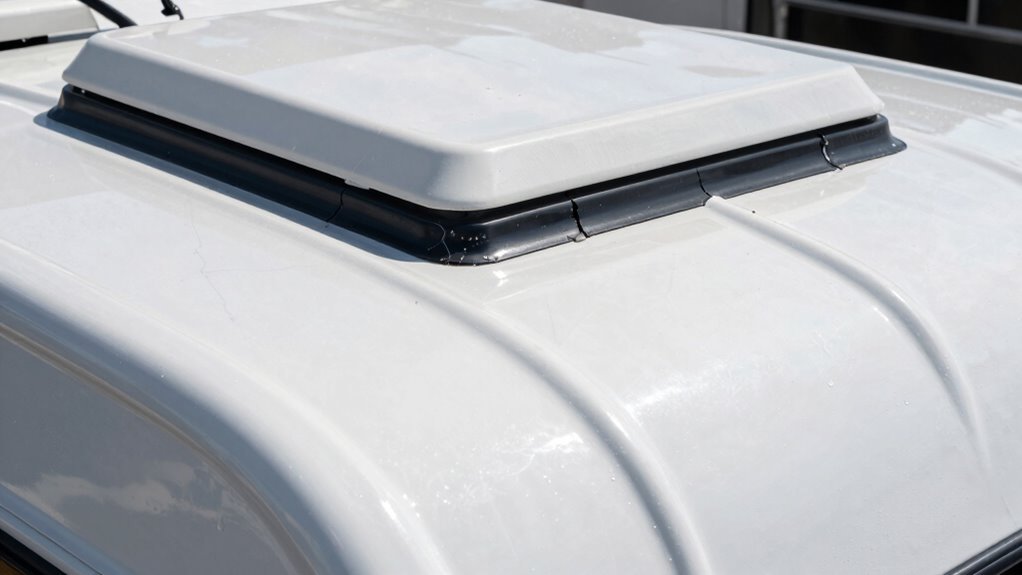
Grab your flashlight and ladder—your RV’s roof is calling for a check-up! Start by scanning for cracked sealant around vents, skylights, and antennas; those sneaky splits love to leak.
Run your hand over the membrane—feel for tears, missing shingles, or soft spots that squish like a sponge.
Shine your flashlight at a low angle to catch tiny cracks or dents that shadows hide.
Don’t skip the front and back caps—those spots often need extra sealant.
Check around sewer caps and roofline edges too; loose joints are party crashers for rain!
If you spot water stains inside, the roof’s probably throwing a drip-dance upstairs.
Use the chalk test or flashlight sweep to confirm suspects.
No leaks yet? Awesome! But check every three months anyway—because surprise floods aren’t *that* fun.
Common Causes of RV Roof Leaks can often be traced to deteriorated sealant joints, which are one of the usual suspects in leak formation.
Stay dry, not damp!
Inspect Windows and Exterior Access Panels
Ever wonder why your once-cozy RV feels like a damp tent after a rainstorm?
Those cute little windows and access panels could be the culprits!
Start by checking for water pooling on sills, stains, or leaks between the glass and frame—telltale signs of trouble.
Look closely for cracks, worn seals, or bent frames, and don’t forget to peek at latches and rubber glazing.
Are the weep holes clogged? Clear ’em with a stiff wire so water can escape like it’s supposed to.
Close the windows tight and give them a hose test—spray around the edges and watch inside for drips.
Do the same for exterior access panels; inspect seals, fit, and clamps just like windows.
If you spot corrosion or gaps, it’s time to seal the deal—literally!
A little maintenance now keeps the indoor rain where it belongs: not inside your RV.
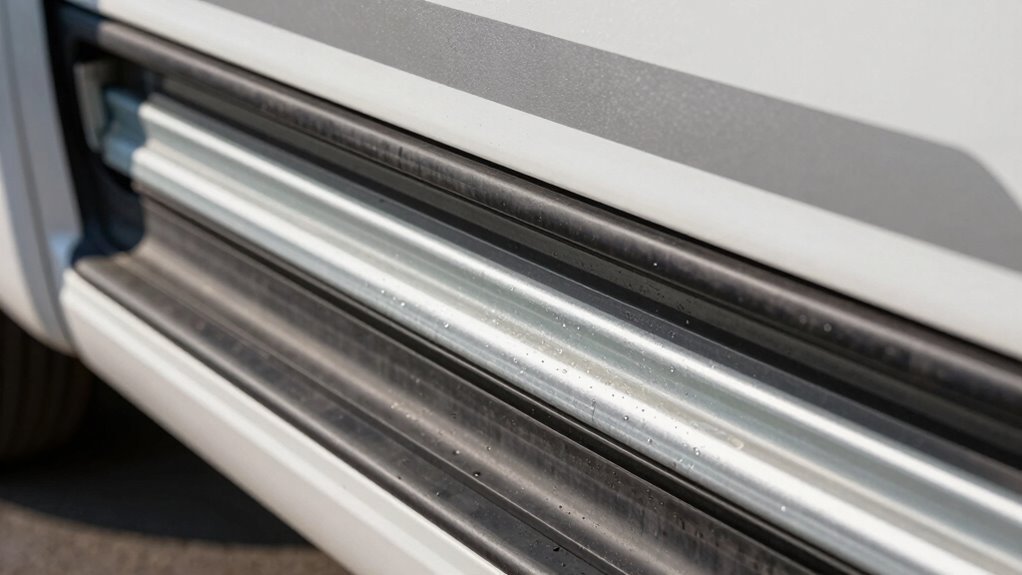
Ensure the window is properly closed with a tight interlock between sliding pane and mullion to prevent water infiltration.
Examine Slide-Outs and Their Sealing Mechanisms
While you’re already on the hunt for sneaky leaks, don’t skip over your RV’s slide-outs—they’re like secret passageways that can turn into water slides if their seals aren’t up to snuff.
Check whether you’ve got rack and pinion, cable, Schwintek, or hydraulic systems—each needs a little love.
Look at wiper and bulb seals: are they cracked, loose, or missing?
Have a buddy extend the slide while you peek from outside—watch how the seals compress and wipe away rain.
Spot frayed cables, low fluid, or misaligned tracks?
Fix ‘em fast.
Gaps in corners? Trim and fit new seals snugly.
Most systems use glue-on, push-on, or peel-n-stick styles—pick the right match.
Clean debris from under slides and confirm everything moves smoothly—no jerking or grinding.
A well-sealed slide keeps your RV cozy and dry, so give it the attention it deserves.
Regular cleaning and inspection can prevent corrosion and mechanical failure.
Win the leak battle—your living room thanks you!
Test the Plumbing System for Hidden Leaks
How does your RV’s plumbing stay sneaky?
It hides leaks where you can’t see—behind walls, under floors, inside cabinets.
But you’ve got tricks up your sleeve.
First, disconnect from city water, fill your freshwater tank, and turn on the pump.
If it runs nonstop or keeps cycling, you’ve got a hidden leak.
For a closer look, use an air compressor at 25–30 PSI with a blow-out plug—hissing or pressure drops?
There’s your culprit.
Spray soapy water on connections; bubbles mean leaks.
Don’t forget fittings under sinks—tighten them gently with a flair-it tool.
Hang flood sensors in wet bays for early warnings.
Shine a flashlight into dark spots and listen closely.
With a little patience and some clever tools, you’ll catch those sneaky drips before they turn into big trouble.
Your RV’s no mystery when you play plumber detective!
Look for Signs of Water Damage Inside Cabinets and Under Flooring
You’ve chased down hidden leaks in the plumbing, outsmarting those sneaky drips behind walls and under floors—now it’s time to see what damage might’ve already made itself at home.
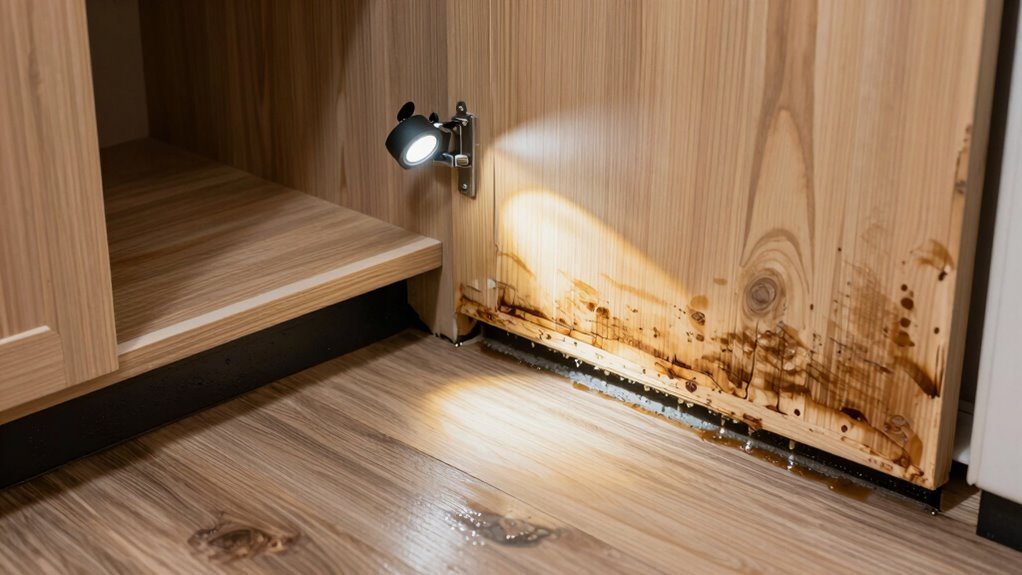
Take a close look inside your cabinets and under flooring—you might just find uninvited houseguests like mold, mushy wood, or funky smells throwing a party. Water loves to hide, but its mess is easy to spot once you know where to peek.
- Check under sinks and cabinets for puddles, warping, or peeling surfaces
- Sniff for musty odors—your nose knows moisture even when your eyes don’t
- Press on floors near cabinets; soft spots mean trouble’s brewing below
- Hunt for dark stains, bubbling laminate, or fluffy mold dancing in corners
Spotting these clues early saves your RV from becoming a soggy surprise.
Time to outsmart that sneaky water—don’t let it win!
Evaluate the Condition of Seams and Joints on the RV’s Exterior
Getting a handle on your RV’s exterior starts with playing detective—grab your flashlight, put on your thinking cap, and let’s go seal hunting!
Start at the roof: check seams, edges, vents, and skylights for cracks, peeling, or gooey bubbles (gross, right?).
Run a hand along window and door frames—any gaps or soft spots?
Flashlight in hand, peek under slide-outs and storage compartments like you’re sneaking into a secret hideout.
Don’t forget corners, lights, antennas—every nook loves to leak.
Clean surfaces first with mild cleaner, then press gently; if it feels spongy, uh-oh, trouble’s brewing.
Look for shrinking sealant or sun-baked cracks—it happens more often than bad hair days.
Check every 90 days or twice a year (your manual knows best).
Use Dicor for flat areas, other sealants for vertical walls.
Prep with alcohol, painter’s tape, and a trusty caulking gun.
Stay sharp, stay dry!
Frequently Asked Questions
How Often Should I Inspect My RV for Leaks?
You should check your RV for leaks at least every 90 days, especially if it’s stored outside—because surprise leaks are about as fun as soggy cereal.
Do quick monthly roof checks if you’re out often or live in harsh weather.
Hit it harder every six months for seals, and reseal the roof yearly.
After storms or trips? Inspect right away.
Catching problems early keeps your adventures dry and drama-free.
Can I Use Household Caulk for RV Seal Repairs?
No, you can’t use household caulk for RV seal repairs—it’s not tough enough!
RVs move, shake, and bake in the sun, and regular caulk cracks or peels fast.
You need special silicone sealant that stretches, sticks to odd materials, and laughs at UV rays.
Think of it: your RV’s doing backflips on highways, and basic caulk’s just along for the disaster.
Use the right stuff, and you’ll stay dry, happy, and leak-free no matter where the road takes you!
Is It Safe to Drive With a Small Roof Leak?
No, you shouldn’t drive with a small roof leak—it’s like ignoring a dripping faucet in your brain; tiny now, but it’ll flood your thoughts fast.
That little leak spreads, rots wood, ruins wiring, and invites mold.
Vibration on the road makes it worse, opening seams like a stubborn pickle jar.
Plus, short circuits? Not the kind of spark you want on a road trip.
Seal it fast—your RV’s health depends on it, and nobody likes a soggy sandwich… or a soggy floor!
Should I Inspect for Leaks Even if I Don’T See Water?
You bet you should check for leaks even if you don’t see water—because by the time you do, damage is already cooking like overdone mac and cheese.
Hidden leaks love to hide behind walls or under floors, ruining your rig from the inside.
A quick sniff for musty smells, a poke at soft spots, and a listen for running pumps can save you big headaches—and even bigger repair bills.
Stay sharp, RV detective!
What’s the Best Weather for Performing a Leak Inspection?
Sunny, dry days after a storm are perfect for spotting leaks—like when Sarah found a hairline crack near her roof vent after a rainy weekend.
You stay calm and dry while checking seals, spraying soapy water, or running a garden hose test.
No wind means no sneaky rain pretending to be leaks, and your tools work better too.
It’s like giving your RV a spa day—relaxing, effective, and drama-free.
Plus, who doesn’t love playing with a hose in the sun?
Conclusion
You’ve sealed, checked, and double-checked—awesome job! Did you know the average RV leak could fill a bathtub in just two weeks? Yikes! But don’t sweat it, smart inspections like yours squash sneaky drips fast. Keep that roof tight, those seals snug, and your next adventure dry. Now go enjoy the open road, not the indoor rainstorm. You’ve earned it, leak-busting pro!
References
- https://www.texasrvguys.com/blog/how-to-repair-rv-roof-a-comprehensive-guide-to-diy-leak-repair-sealing-and-protection/
- https://leisurecw.com/how-to/rooftop-rv-leaks-and-you-preventing-finding-and-fixing-the-problem/
- https://www.youtube.com/watch?v=ezJeYBYkoWE
- https://www.rvtravel.com/rv-roofline-maintenance-simple-check-prevents-big-leaks-2800/
- https://www.rvproseal.ca/blog/f/how-to-assess-rv-windows-for-leaks
- https://www.lippert.com/blog/rv-window-leak
- https://mobilervglass.com/rv-window-leak-repair/
- https://www.youtube.com/watch?v=rGRtGSVKAmE
- https://www.youtube.com/watch?v=hvZ9e9_naeI
- https://support.lci1.com/videos/leaking-window-inspection