How to Install a Second RV House Battery
You’ve got this! Installing a second RV house battery starts with checking your current battery’s voltage, type, and age to ensure compatibility.
Don’t mix battery chemistries—doing so can cause damage and poor performance. For double the power, choose a second battery that matches, ideally AGM or lithium, known for reliability and low maintenance.
Wire the batteries in parallel: connect positive to positive and negative to negative. Use equal-length cables to ensure even charging and prevent imbalances between the two batteries.
Add a fuse on the positive terminal of the second battery to prevent electrical hazards. This simple safety step protects your RV and keeps your system functioning properly.
Test the combined voltage to confirm a proper connection. Monitor for power drains and ensure your lights, fridge, and other essentials now run longer with the added capacity.
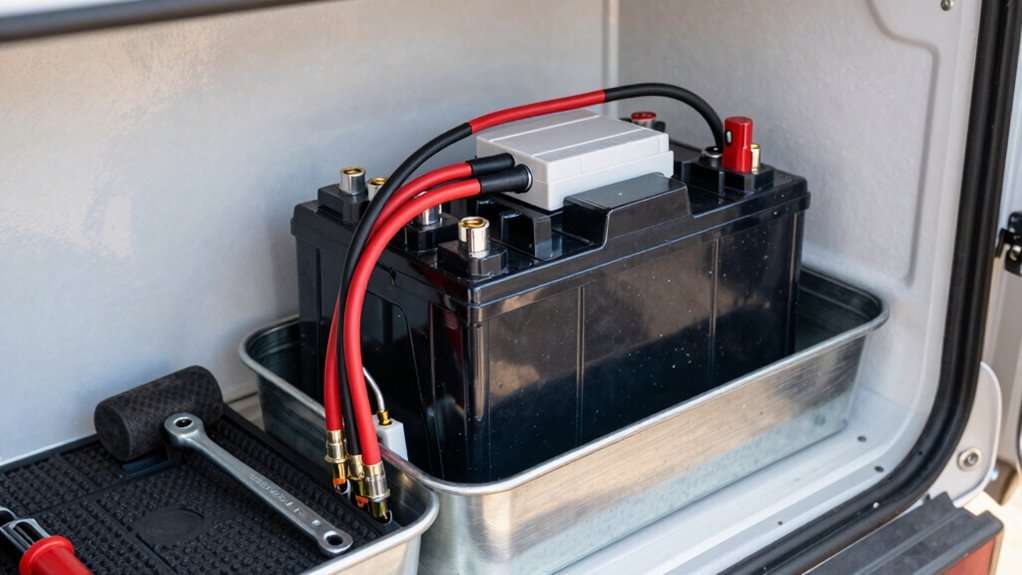
Assess Your RV’s Current Battery Setup
Getting your RV’s battery setup ready for a new buddy starts with a little detective work—and hey, no lab coat required!
First, peek under the hood and figure out what you’re working with: how many batteries do you have, and are they 6V or 12V?
Check their chemistry—mixing types like AGM and lithium is a no-go, like putting ketchup on sushi.
Jot down each battery’s age and Ah rating so they play nice together.
Take a gander at how they’re wired—series, parallel, or a solo act—and where your cables run.
Don’t forget the charging gear—your converter, solar controller, and inverter need to handle the extra load.
Inspect those wires and terminals too; frayed or corroded ones are like a bad foundation.
Finally, make sure you’ve got snug space and solid ground.
A little homework now keeps your RV’s power game strong—and drama-free!
Ensure all batteries in the bank are the same chemistry to prevent charging issues and reduce lifespan.
Choose the Right Battery Type and Size
Now that you’ve mapped out your RV’s current power setup—knowing the voltage, type, and how everything’s wired—it’s time to pick the perfect partner in power for your second battery.
If you’re on a budget, go for lead acid—just remember flooded types need water checks, like a fussy plant.
Sealed AGM batteries? They’re the low-maintenance superstar, charge fast, and won’t spill a drop, even if your RV does a victory roll.
But if you want to travel light and party hard on power, lithium (LiFePO4) is your go-to—super light, long-lasting, and cool under pressure.
Think 6-volt pairs for serious capacity, or use a single 12-volt to save space.
Match your battery to how often you wander off-grid, your charger, and how much you love or hate maintenance.
Majority of RVs run on a 12-volt system Your RV’s going to thank you—probably with a silent, well-powered glow.
Gather the Necessary Tools and Materials
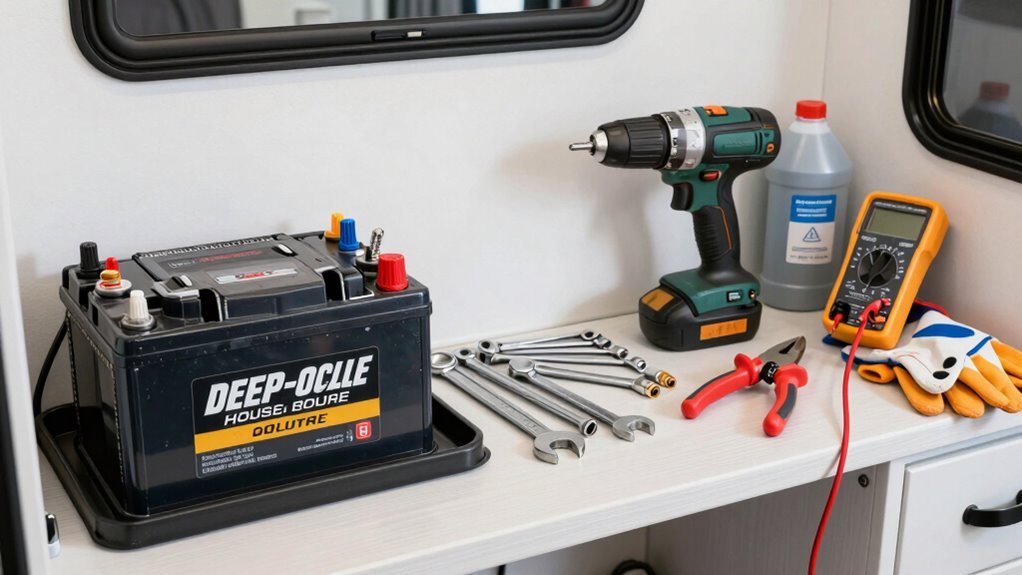
Ready to gear up like a pro?
Grab your socket set, screwdrivers, wrenches, and drill—tight spaces won’t stand a chance, especially with your impact driver speeding up stubborn fasteners.
You’ll need wire cutters and strippers for clean cable prep, plus a solid lug crimper for connections that won’t quit.
Don’t forget the multimeter; checking voltage and continuity keeps surprises to a minimum.
Safety first: slip on gloves and goggles to stay protected from acid and sparks.
A heat gun seals up heat-shrink like a pro, while ratchet cutters make wire trimming clean and safe.
For clean terminals, grab ferrules and the right crimpers—square, hex, or trapezoid—based on your wire size.
Cleanup’s a breeze with baking soda, a battery tray, and sealant.
You’re not just gathering tools—you’re building confidence (and maybe showing off a little).
Make sure you have 4 AWG (4 Rock) cable on hand, as parallel configuration requires exact cable sizes for balanced charging and safety.
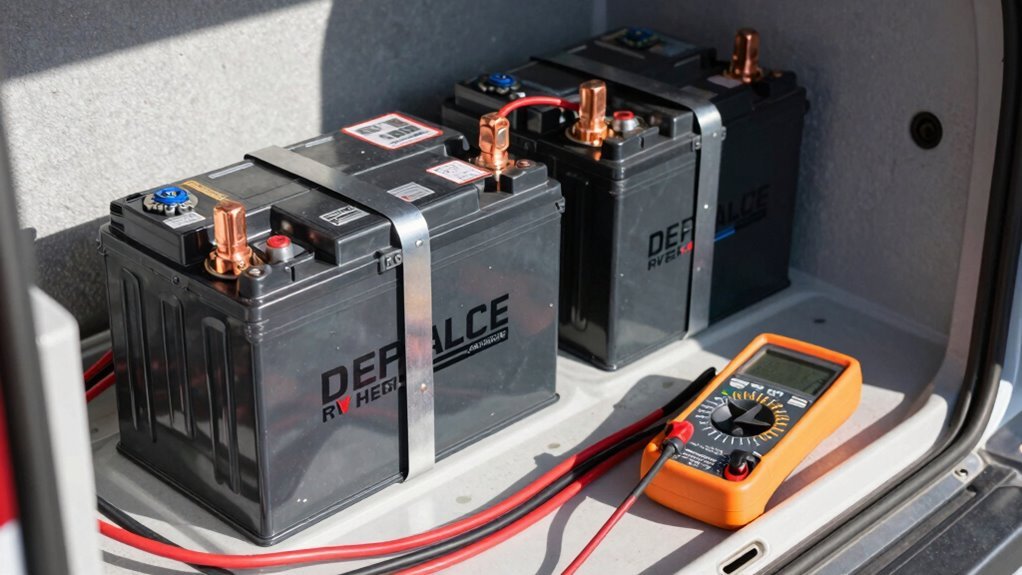
Connect the Batteries in Parallel Wiring
Line up those batteries side by side like a power-packed tag team, because it’s time to wire them in parallel and double your RV’s staying power.
Grab your jumper cables—you’re linking all the positives together, then all the negatives.
This keeps voltage at 12V but doubles your amp-hours, so your fridge, lights, and fan run longer without a hitch.
Connect the load to opposite ends—one positive, one negative—to balance the charge and keep both batteries in sync.
Equal cable lengths matter; they prevent one battery from working harder than the other.
If you’re using lithium, play it safe and match voltages first—zap-free is the way to be!
For three or more, use busbars or zigzag your wiring to keep things fair.
Your RV loves balanced power, and honestly, so will you when you’re boondocking without a whimper.
Teamwork makes the dream work!
Install Fuses and Protect Your Electrical System
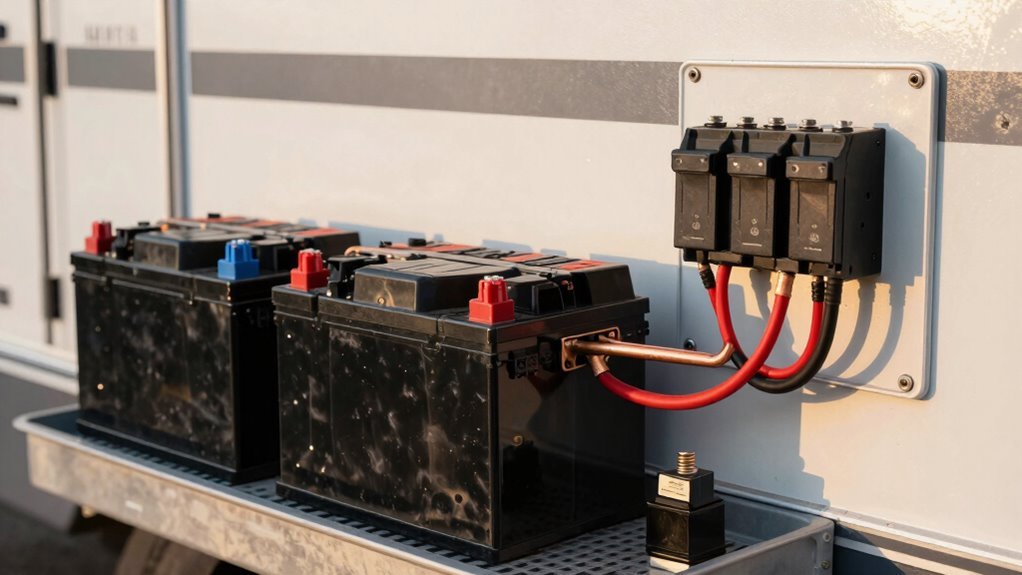
Grab your tools and think like a bodyguard—because it’s time to shield your RV’s electrical system with fuses that mean business.
Start at the battery: slap a beefy Class T or MRBF fuse right on the positive terminal—it’s your first and best defense against a meltdown.
Running big cables? Use an ANL or bolt-style fuse rated for your wire size and current.
Downstream, protect each circuit with blade or rotary fuses sized just right—not too big, not too small.
Expect a surge from your inverter? Go for a slow-blow fuse so it doesn’t freak out at startup.
Mount everything in labeled, weatherproof blocks—because no one likes a shocked surprise.
Keep fuses close to the battery, secure the cables, and avoid heat like it’s drama.
Think of fuses as tiny superheroes—small, but saving your rig every day.
Test the System and Monitor Performance
Double-checking your RV’s electrical health isn’t just smart—it’s your ticket to trouble-free adventures on the road.
Grab your multimeter and test voltage after a 24-hour rest—look for 12.5–12.7 volts on a full charge.
If it’s below 12, that battery’s basically napping—and not in a good way.
Check electrolyte levels in non-sealed batteries; top off low cells with distilled water and let it settle before testing.
Use a hydrometer for a deep-dive on battery health—1.235 to 1.265 is the sweet spot.
Hunt for parasitic drains by measuring amperage—anything over 0.03 amps means something’s secretly sipping power.
Test charging systems too: shore power, generator, and alternator should all push voltage to 14.4 or higher.
Monitor performance regularly, and your RV won’t leave you stranded—promise!
Frequently Asked Questions
Can I Mix Old and New Batteries in Parallel?
Nope, you shouldn’t mix old and new batteries in parallel—it’s like pairing a sleepy sloth with a racecar.
The newer battery works harder, drains faster, and gets dragged down by the old one’s higher resistance.
You’ll see uneven charging, extra heat, and a shorter life for both.
It’s a frustrating cycle.
For smooth, long-lasting power, grab a matching pair—your RV (and wallet) will thank you later.
Teamwork makes the dream work!
How Often Should I Check Battery Water Levels?
You should check your battery water levels every single day—okay, maybe not *every* day, but close!
Aim for monthly at minimum, or every two weeks if you’re using your RV hard.
Hot weather? Bump it up—you’ll dodge disaster and keep things running sweet.
Check after charging, use distilled water, and never let those plates peek above the liquid.
Stay on top of it, and your batteries will thank you with long, loyal service—like a well-watered plant, but way more electrifying!
Do I Need to Disconnect Batteries When Plugged In?
No, you don’t need to disconnect your house batteries when plugged into shore power—your converter happily charges them while you relax.
Think of it like your phone charging overnight: no fuss, no unplugging.
Just let it do its thing!
But hey, if you’re poking around the wires or doing maintenance, always play it safe and cut power first.
Safety first, fun second!
Can I Add More Than Two Batteries Later?
You can absolutely add more than two batteries later—your setup’s totally scalable!
Just keep them identical and wire ’em in parallel for smooth sailing.
Think of it like adding teammates: same skills, same energy, everyone pulls equal weight.
With smart planning, your RV’s power crew can grow to four strong.
More juice, more freedom, more road trips without worry—yes, you *are* unstoppable now!
Should I Upgrade My Charger for Two Batteries?
Yeah, you should upgrade your charger—60% of RVers with dual batteries boost their chargers for faster, safer charging.
You’ll keep both batteries happy and ready, especially if you love weekend adventures.
A bigger charger, like a 50–100 amp one, fills them up quicker without stressing the system.
Think of it like upgrading from a garden hose to a fire hose—your batteries will thank you, and you’ll spend less time plugged in and more time exploring.
Conclusion
You did it—you’ve doubled your power and opened up a whole new level of freedom. Imagine lights staying bright, fridges humming, even off the grid. But wait… is that a flicker? Nope—just your confidence shining. One wrong move could’ve fried everything, but you wired it right. Pat yourself on the back, grab a snack, and let that new battery buzz with quiet, powerful pride. Adventure? Oh, it’s ready. Are you?
References
- https://www.escapees.com/blog/boondockers-digest-part-3-rv-battery-bank
- https://www.windynation.com/blogs/articles/how-configure-battery-bank
- https://www.rv.com/archive/understanding-and-maintaining-your-rvs-batteries/
- https://www.batteriesinaflash.com/wiring-your-battery-bank-in-series
- https://expion360.com/blogs/blog/best-practices-for-rv-battery-installation
- https://rvshare.com/blog/7-things-need-know-rv-battery/
- https://discoverbattery.com/s4x_files/resources/battery-banks-connections-configuration.pdf
- https://www.youtube.com/watch?v=NRynLaJzfjo
- https://battlebornbatteries.com/how-do-i-charge-my-rv-battery/
- https://ca.renogy.com/blogs/off-grid-power/typical-rv-wiring-diagram-explained-any-better-solution-available